The Nokia 5110 display has long been an Arduino Hobbyist favorite and a search of the internet will show that there are tons of different ways to drive this device.
There are a few varieties of this module are out there. Mine are labeled as you see below. Others should work just fine with this tutorial if you map your pins correctly.
Remember, VCC is 3.3 Volts. The LIGHT Control can use pulse width modulation through a 330 ohm resistor.
Gambar 1.
LCD Specifications
- Controller: PCD8544
- Supply: 2.7V to 3.3V
- Interface levels: 2.7V to 5V
- Backlight Colour: Blue
- Backlight supply: 3.3V Max
- Module size: W 43.6mm x H 43.1mm
- Working current: < 200uA (Backlight off)
Notice that the module only needs 3.3v from the Arduino. More information can be found on the Datasheet located here.
Gambar 2. [sumber]
Gambar 3. [sumber]
Koneksi pada Gambar 3 hanya contoh, pin pada Arduino dapat diatur sesuai keperluan dan dukungan pustaka.
Untuk penggunaan LCD Nokia 5110, salah satu pustaka yang bisa dipergunakan adalah u8glib (atau versi yang lebih baru u8g2). Sebagai contoh untuk uji coba, dapat diikuti kode program dari: henrysbench.capnfatz.com berikut:
// Henry's Bench
// Arduino Nokia 5110 U8Glib Tutorial


#include "U8glib.h"


#define backlight 11

//Delcare the display and assign the pins

//U8GLIB_PCD8544 u8g(8, 4, 7, 5, 6);  // CLK=8, DIN=4, CE=7, DC=5, RST=6


U8GLIB_PCD8544 u8g(8, 4, 7, 5, 6);  // CLK=8, DIN=4, CE=7, DC=5, RST=6


void draw() {

  u8g.setFont(u8g_font_profont11);  // select font
  u8g.drawStr(0, 15, "Nokia 5110..");  // put string of display at position X, Y
  u8g.drawStr(29, 35, "HELLO!!!!");


}

void setup()
{
  // Set Backlight Intensity
  // 0 is Fully bright
  // 255 is off
  analogWrite(backlight, 20);
  //
  // Enter the U8Glib Picture Loop
  //

}

void loop()
{
 u8g.firstPage();
  do
  {
    draw();
  } while( u8g.nextPage() );

}
Salah satu pustaka/library yang umum dipergunakan untuk LCD Nokia 5110 adalah pustaka yang dikeluarkan oleh Adafruit. Terdapat dua bagian pustaka untuk lcd ini, satu adalah untuk driver hardware dan satu untuk pustaka grafik.
Urutan pin LCD 5110 pada produk Adafruit bisa jadi tidak sama dengan urutan pin LCD 5110 yang bisa dibeli di pasaran lokal (impor dari China). Meskipun begitu, pustaka dapat dipergunakan dan berfungsi secara normal.
Testing
You can find our Nokia Display Arduino library on github. To install it, click this button to download the compressed ZIP file then install it. This guide will help you with the install process if you have never installed an Arduino library.
Then you’ll have to do the same for the Adafruit GFX Graphics core library, available from github. Click the button to download it. Then install Adafruit_GFX just like the library you’ve done except this time name it Adafruit_GFX, etc.
Restart the Arduino software. You should see a new example folder called Adafruit_PCD8544 and inside, an example called pcdtest. Open up that sketch and upload it to your Arduino. You should see the example test sequence.
Graphics Library
We have a ready to go basic graphics library that has primitives for bitmaps, shapes and text. You can probably do everything you want using it. Because of the way the display works we need to buffer the entire display in ram which is 84×48 bits (504 bytes). However, screen updates are very fast.
For more details about the Adafruit GFX library, please visit http://learn.adafruit.com/adafruit-gfx-graphics-library – it supports lines, rectangles, roundrects, circles, text of different sizes etc.
Note that since this display is MONOCHROMATIC it only supports two colors: BLACK or WHITE. BLACK is a displayed dot and WHITE is for erasing pixels
Dont forget, after drawing anything to the screen, call display() to write it out to the LCD!Downloads
Our PCD8544 (Nokia 5110) LCD display Arduino library is on github which comes with example code. This library uses 1/2 Kbytes of RAM since it needs to buffer the entire display but its very fast! The code is simple to adapt to any other microcontroller.
You’ll also need to get the Adafruit GFX Graphics core library which can print text, bitmaps, pixels, rectangles, circles and lines, also available on github.
The PCD8544 datasheet tells you all about what the display can do.
This is a library for our Monochrome Nokia 5110 LCD Displays
Pick one up today in the adafruit shop!
——> http://www.adafruit.com/products/338These displays use SPI to communicate, 4 or 5 pins are required to
interfaceAdafruit invests time and resources providing this open source code,
please support Adafruit and open-source hardware by purchasing
products from Adafruit!Written by Limor Fried/Ladyada for Adafruit Industries.
BSD license, check license.txt for more information
All text above must be included in any redistributionTo download. click the DOWNLOADS button in the top right corner, rename the uncompressed folder Adafruit_PCD8544. Check that the Adafruit_PCD8544 folder contains Adafruit_PCD8544.cpp and Adafruit_PCD8544.h
Place the Adafruit_PCD8544 library folder your <arduinosketchfolder>/libraries/ folder. You may need to create the libraries subfolder if its your first library. Restart the IDE.
You will also have to download the Adafruit GFX Graphics core which does all the circles, text, rectangles, etc. You can get it from
https://github.com/adafruit/Adafruit-GFX-Library
and download/install that library as well
This is an example sketch for our Monochrome Nokia 5110 LCD Displays
/*********************************************************************
This is an example sketch for our Monochrome Nokia 5110 LCD Displays

  Pick one up today in the adafruit shop!
  ------> http://www.adafruit.com/products/338

These displays use SPI to communicate, 4 or 5 pins are required to
interface

Adafruit invests time and resources providing this open source code,
please support Adafruit and open-source hardware by purchasing
products from Adafruit!

Written by Limor Fried/Ladyada  for Adafruit Industries.
BSD license, check license.txt for more information
All text above, and the splash screen must be included in any redistribution
*********************************************************************/

#include <SPI.h>
#include <Adafruit_GFX.h>
#include <Adafruit_PCD8544.h>

// Software SPI (slower updates, more flexible pin options):
// pin 7 - Serial clock out (SCLK)
// pin 6 - Serial data out (DIN)
// pin 5 - Data/Command select (D/C)
// pin 4 - LCD chip select (CS)
// pin 3 - LCD reset (RST)
// Adafruit_PCD8544 display = Adafruit_PCD8544(7, 6, 5, 4, 3);
Adafruit_PCD8544 display = Adafruit_PCD8544(8, 4, 5, 7, 6);

// U8GLIB_PCD8544 u8g(8, 4, 7, 5, 6);  // CLK=8, DIN=4, CE=7, DC=5, RST=6


// Hardware SPI (faster, but must use certain hardware pins):
// SCK is LCD serial clock (SCLK) - this is pin 13 on Arduino Uno
// MOSI is LCD DIN - this is pin 11 on an Arduino Uno
// pin 5 - Data/Command select (D/C)
// pin 4 - LCD chip select (CS)
// pin 3 - LCD reset (RST)
// Adafruit_PCD8544 display = Adafruit_PCD8544(5, 4, 3);
// Note with hardware SPI MISO and SS pins aren't used but will still be read
// and written to during SPI transfer.  Be careful sharing these pins!

#define NUMFLAKES 10
#define XPOS 0
#define YPOS 1
#define DELTAY 2


#define LOGO16_GLCD_HEIGHT 16
#define LOGO16_GLCD_WIDTH  16

static const unsigned char PROGMEM logo16_glcd_bmp[] =
{ B00000000, B11000000,
  B00000001, B11000000,
  B00000001, B11000000,
  B00000011, B11100000,
  B11110011, B11100000,
  B11111110, B11111000,
  B01111110, B11111111,
  B00110011, B10011111,
  B00011111, B11111100,
  B00001101, B01110000,
  B00011011, B10100000,
  B00111111, B11100000,
  B00111111, B11110000,
  B01111100, B11110000,
  B01110000, B01110000,
  B00000000, B00110000 };

void setup()   {
  Serial.begin(9600);

  display.begin();
  // init done

  // you can change the contrast around to adapt the display
  // for the best viewing!
  display.setContrast(60);

  display.display(); // show splashscreen
  delay(2000);
  display.clearDisplay();   // clears the screen and buffer

  // draw a single pixel
  display.drawPixel(10, 10, BLACK);
  display.display();
  delay(2000);
  display.clearDisplay();

  // draw many lines
  testdrawline();
  display.display();
  delay(2000);
  display.clearDisplay();

  // draw rectangles
  testdrawrect();
  display.display();
  delay(2000);
  display.clearDisplay();

  // draw multiple rectangles
  testfillrect();
  display.display();
  delay(2000);
  display.clearDisplay();

  // draw mulitple circles
  testdrawcircle();
  display.display();
  delay(2000);
  display.clearDisplay();

  // draw a circle, 10 pixel radius
  display.fillCircle(display.width()/2, display.height()/2, 10, BLACK);
  display.display();
  delay(2000);
  display.clearDisplay();

  testdrawroundrect();
  delay(2000);
  display.clearDisplay();

  testfillroundrect();
  delay(2000);
  display.clearDisplay();

  testdrawtriangle();
  delay(2000);
  display.clearDisplay();

  testfilltriangle();
  delay(2000);
  display.clearDisplay();

  // draw the first ~12 characters in the font
  testdrawchar();
  display.display();
  delay(2000);
  display.clearDisplay();

  // text display tests
  display.setTextSize(1);
  display.setTextColor(BLACK);
  display.setCursor(0,0);
  display.println("Hello, world!");
  display.setTextColor(WHITE, BLACK); // 'inverted' text
  display.println(3.141592);
  display.setTextSize(2);
  display.setTextColor(BLACK);
  display.print("0x"); display.println(0xDEADBEEF, HEX);
  display.display();
  delay(2000);

  // rotation example
  display.clearDisplay();
  display.setRotation(1);  // rotate 90 degrees counter clockwise, can also use values of 2 and 3 to go further.
  display.setTextSize(1);
  display.setTextColor(BLACK);
  display.setCursor(0,0);
  display.println("Rotation");
  display.setTextSize(2);
  display.println("Example!");
  display.display();
  delay(2000);

  // revert back to no rotation
  display.setRotation(0);

  // miniature bitmap display
  display.clearDisplay();
  display.drawBitmap(30, 16,  logo16_glcd_bmp, 16, 16, 1);
  display.display();

  // invert the display
  display.invertDisplay(true);
  delay(1000);
  display.invertDisplay(false);
  delay(1000);

  // draw a bitmap icon and 'animate' movement
  testdrawbitmap(logo16_glcd_bmp, LOGO16_GLCD_WIDTH, LOGO16_GLCD_HEIGHT);
}


void loop() {

}


void testdrawbitmap(const uint8_t *bitmap, uint8_t w, uint8_t h) {
  uint8_t icons[NUMFLAKES][3];
  randomSeed(666);     // whatever seed

  // initialize
  for (uint8_t f=0; f< NUMFLAKES; f++) {
    icons[f][XPOS] = random(display.width());
    icons[f][YPOS] = 0;
    icons[f][DELTAY] = random(5) + 1;

    Serial.print("x: ");
    Serial.print(icons[f][XPOS], DEC);
    Serial.print(" y: ");
    Serial.print(icons[f][YPOS], DEC);
    Serial.print(" dy: ");
    Serial.println(icons[f][DELTAY], DEC);
  }

  while (1) {
    // draw each icon
    for (uint8_t f=0; f< NUMFLAKES; f++) {
      display.drawBitmap(icons[f][XPOS], icons[f][YPOS], logo16_glcd_bmp, w, h, BLACK);
    }
    display.display();
    delay(200);

    // then erase it + move it
    for (uint8_t f=0; f< NUMFLAKES; f++) {
      display.drawBitmap(icons[f][XPOS], icons[f][YPOS],  logo16_glcd_bmp, w, h, WHITE);
      // move it
      icons[f][YPOS] += icons[f][DELTAY];
      // if its gone, reinit
      if (icons[f][YPOS] > display.height()) {
	icons[f][XPOS] = random(display.width());
	icons[f][YPOS] = 0;
	icons[f][DELTAY] = random(5) + 1;
      }
    }
   }
}


void testdrawchar(void) {
  display.setTextSize(1);
  display.setTextColor(BLACK);
  display.setCursor(0,0);

  for (uint8_t i=0; i < 168; i++) {
    if (i == 'n') continue;
    display.write(i);
    //if ((i > 0) && (i % 14 == 0))
      //display.println();
  }
  display.display();
}

void testdrawcircle(void) {
  for (int16_t i=0; i<display.height(); i+=2) {
    display.drawCircle(display.width()/2, display.height()/2, i, BLACK);
    display.display();
  }
}

void testfillrect(void) {
  uint8_t color = 1;
  for (int16_t i=0; i<display.height()/2; i+=3) {
    // alternate colors
    display.fillRect(i, i, display.width()-i*2, display.height()-i*2, color%2);
    display.display();
    color++;
  }
}

void testdrawtriangle(void) {
  for (int16_t i=0; i<min(display.width(),display.height())/2; i+=5) {
    display.drawTriangle(display.width()/2, display.height()/2-i,
                     display.width()/2-i, display.height()/2+i,
                     display.width()/2+i, display.height()/2+i, BLACK);
    display.display();
  }
}

void testfilltriangle(void) {
  uint8_t color = BLACK;
  for (int16_t i=min(display.width(),display.height())/2; i>0; i-=5) {
    display.fillTriangle(display.width()/2, display.height()/2-i,
                     display.width()/2-i, display.height()/2+i,
                     display.width()/2+i, display.height()/2+i, color);
    if (color == WHITE) color = BLACK;
    else color = WHITE;
    display.display();
  }
}

void testdrawroundrect(void) {
  for (int16_t i=0; i<display.height()/2-2; i+=2) {
    display.drawRoundRect(i, i, display.width()-2*i, display.height()-2*i, display.height()/4, BLACK);
    display.display();
  }
}

void testfillroundrect(void) {
  uint8_t color = BLACK;
  for (int16_t i=0; i<display.height()/2-2; i+=2) {
    display.fillRoundRect(i, i, display.width()-2*i, display.height()-2*i, display.height()/4, color);
    if (color == WHITE) color = BLACK;
    else color = WHITE;
    display.display();
  }
}

void testdrawrect(void) {
  for (int16_t i=0; i<display.height()/2; i+=2) {
    display.drawRect(i, i, display.width()-2*i, display.height()-2*i, BLACK);
    display.display();
  }
}

void testdrawline() {
  for (int16_t i=0; i<display.width(); i+=4) {
    display.drawLine(0, 0, i, display.height()-1, BLACK);
    display.display();
  }
  for (int16_t i=0; i<display.height(); i+=4) {
    display.drawLine(0, 0, display.width()-1, i, BLACK);
    display.display();
  }
  delay(250);

  display.clearDisplay();
  for (int16_t i=0; i<display.width(); i+=4) {
    display.drawLine(0, display.height()-1, i, 0, BLACK);
    display.display();
  }
  for (int8_t i=display.height()-1; i>=0; i-=4) {
    display.drawLine(0, display.height()-1, display.width()-1, i, BLACK);
    display.display();
  }
  delay(250);

  display.clearDisplay();
  for (int16_t i=display.width()-1; i>=0; i-=4) {
    display.drawLine(display.width()-1, display.height()-1, i, 0, BLACK);
    display.display();
  }
  for (int16_t i=display.height()-1; i>=0; i-=4) {
    display.drawLine(display.width()-1, display.height()-1, 0, i, BLACK);
    display.display();
  }
  delay(250);

  display.clearDisplay();
  for (int16_t i=0; i<display.height(); i+=4) {
    display.drawLine(display.width()-1, 0, 0, i, BLACK);
    display.display();
  }
  for (int16_t i=0; i<display.width(); i+=4) {
    display.drawLine(display.width()-1, 0, i, display.height()-1, BLACK);
    display.display();
  }
  delay(250);
}
Tinkering dari kode pada: blog.rniemand.com
#include <SPI.h> //Menghindari error pada Stino
#include <Adafruit_GFX.h>
#include <gfxfont.h>
#include <Adafruit_PCD8544.h>


// Define the pins used to control the LCD module
// #define LCD_SCLK    13
// #define LCD_DIN     11
// #define LCD_DC      5
// #define LCD_CS      7
// #define LCD_RST     6

// U8GLIB_PCD8544 u8g(8, 4, 7, 5, 6);  // CLK=8, DIN=4, CE=7, DC=5, RST=6

// Define the pins used to control the LCD module
#define LCD_SCLK    8
#define LCD_DIN     4
#define LCD_DC      5
#define LCD_CS      7
#define LCD_RST     6

//Pindah koneksi BL dari 3.3 V ke pin 11
#define backlight 11

// Create a global instance of the display object
Adafruit_PCD8544 display = Adafruit_PCD8544(
  LCD_SCLK, LCD_DIN, LCD_DC, LCD_CS, LCD_RST
);

void setup() {
  // Start the display and set a good contrast
  display.begin();
  // display.setContrast(50);

  display.setContrast(60);
  display.clearDisplay();
  // delay(3000);
  analogWrite(backlight, 30);

}

void loop() {
  display.clearDisplay();
  display.println("   Uji coba   ");
  display.println("");
  display.println("   LCD 5110   ");
  display.println("");
  display.println(" Hello World");

  display.setCursor(72,40);
  display.println("SP");


  display.display();
  delay(1000);
}
mkme.org: Arduino Code for Nokia 5110 LCD
/*


This is a work in progress but hopefully it will help someone else by providing
a base to start and work from.
Please check out my Youtube videos here and consider a thumbs up if this helped you!
Youtube : http://www.youtube.com/user/Shadow5549
Website, Forum and store are at http://mkme.org

Pin 11 for PWM LCD backlight on the Nokia 5110
pin 7 - Serial clock out (SCLK)
pin 6 - Serial data out (DIN)
pin 5 - Data/Command select (D/C)
pin 4 - LCD chip select (CS)
pin 3 - LCD reset (RST)
*/


// #include "Adafruit_GFX.h"
// #include "Adafruit_PCD8544.h"

#include <SPI.h>
#include <Adafruit_GFX.h>
#include <Adafruit_PCD8544.h>

// Adafruit_PCD8544 display = Adafruit_PCD8544(7, 6, 5, 4, 3);//4 and 3 are reversed on the cheap eBay models

Adafruit_PCD8544 display = Adafruit_PCD8544(8, 4, 5, 7, 6);


void setup() {

  Serial.begin(9600);
  analogWrite(11,220);// PWM of LCD backlight but ebay unit is backwards-
  //must go high + cycle to dim
  //Very Dim=230
  Serial.println("Running...");
  display.begin();//Display code
  display.setContrast(60);//Nokia 5110 works best around 50- change to suit your unit
  delay(1000);
  display.clearDisplay();     // clears the screen and buffer
  display.setTextSize(1);     // set text size
  display.setTextColor(BLACK);
  //delay(1000);
  // Splash Screen- taken from example code
  display.setTextSize(1);
  display.setTextColor(BLACK);
  display.setCursor(0,0);//set cursor top left
  display.println("   Eric's");//Prints the first line then a line break- leave off the ln characters to continue on the same line!
  display.println("");
  display.println("   Gizmos");
  display.println("   DooDad");
  display.println("   Thingy");
  display.display();//this command writes all the preceeding info to the lcd
  delay(2000);//wait 2 seconds
  display.clearDisplay();     // clears the screen and buffer

}

void loop() {

LCDDisplay();

}

void LCDDisplay(){
  display.clearDisplay();              // clears the screen and buffer
  display.setCursor(0,0);
  display.println(" Analog Pin 0");
  //display.setCursor(5, 1);
  display.println ("");
  int sensorValue = analogRead(A0);
  display.setTextSize(2);     // set text sizebigger
  display.println(sensorValue);//print the pin value driectly
  display.setTextSize(1); //set text size back smaller
  display.println("Raw Value");
  display.display();
  //delay(2000);
}
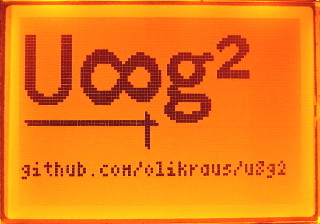 Gambar 5. [u8g2/wiki]
U8g2 is a monochrome graphics library for embedded devices.
- Supported Display Controller: SSD1305, SSD1306, SSD1309, SSD1322, SSD1325, SSD1327, SSD1329, SSD1606, SSD1607, SH1106, T6963, RA8835, LC7981, PCD8544, PCF8812, UC1604, UC1608, UC1610, UC1611, UC1701, ST7565, ST7567, NT7534, IST3020, ST7920, LD7032, KS0108 (see here for a full list)
- The Arduino library U8g2 can be installed from the library manager of the Arduino IDE.
U8g2 also includes U8x8 library. Features for U8g2 and U8x8 are:
- U8g2
- Includes all graphics procedures (line/box/circle draw).
- Supports many fonts. (Almost) no restriction on the font height.
- Requires some memory in the microcontroller to render the display.
- U8x8
- Text output only (character) device.
- Only fonts allowed with fixed size per character (8×8 pixel).
- Writes directly to the display. No buffer in the microcontroller required.
Overview
- Gallery
- How to install U8g2
- Intoduction to U8g2
- U8g vs. U8g2 (with code porting guide)
- Supported Arduino Boards
- FAQ
Code Reference
- U8g2 C++/Arduino Setup
- U8g2 C Setup
- U8x8 C++/Arduino Setup
- U8x8 C Setup
- U8g2 Reference Manual
- U8x8 Reference Manual
Font Reference
Other
“Hello World” version for U8x8 API
/*

  HelloWorld.ino

  "Hello World" version for U8x8 API

  Universal 8bit Graphics Library (https://github.com/olikraus/u8g2/)

  Copyright (c) 2016, olikraus@gmail.com
  All rights reserved.

  Redistribution and use in source and binary forms, with or without modification,
  are permitted provided that the following conditions are met:

  * Redistributions of source code must retain the above copyright notice, this list
    of conditions and the following disclaimer.

  * Redistributions in binary form must reproduce the above copyright notice, this
    list of conditions and the following disclaimer in the documentation and/or other
    materials provided with the distribution.

  THIS SOFTWARE IS PROVIDED BY THE COPYRIGHT HOLDERS AND
  CONTRIBUTORS "AS IS" AND ANY EXPRESS OR IMPLIED WARRANTIES,
  INCLUDING, BUT NOT LIMITED TO, THE IMPLIED WARRANTIES OF
  MERCHANTABILITY AND FITNESS FOR A PARTICULAR PURPOSE ARE
  DISCLAIMED. IN NO EVENT SHALL THE COPYRIGHT HOLDER OR
  CONTRIBUTORS BE LIABLE FOR ANY DIRECT, INDIRECT, INCIDENTAL,
  SPECIAL, EXEMPLARY, OR CONSEQUENTIAL DAMAGES (INCLUDING, BUT
  NOT LIMITED TO, PROCUREMENT OF SUBSTITUTE GOODS OR SERVICES;
  LOSS OF USE, DATA, OR PROFITS; OR BUSINESS INTERRUPTION) HOWEVER
  CAUSED AND ON ANY THEORY OF LIABILITY, WHETHER IN CONTRACT,
  STRICT LIABILITY, OR TORT (INCLUDING NEGLIGENCE OR OTHERWISE)
  ARISING IN ANY WAY OUT OF THE USE OF THIS SOFTWARE, EVEN IF
  ADVISED OF THE POSSIBILITY OF SUCH DAMAGE.

*/

#include <Wire.h>
#include <Arduino.h>
#include <U8x8lib.h>

#ifdef U8X8_HAVE_HW_SPI
#include <SPI.h>
#endif

// Please UNCOMMENT one of the contructor lines below
// U8x8 Contructor List
// The complete list is available here: https://github.com/olikraus/u8g2/wiki/u8x8setupcpp
// Please update the pin numbers according to your setup. Use U8X8_PIN_NONE if the reset pin is not connected

U8X8_PCD8544_84X48_4W_SW_SPI u8x8(/* clock=*/ 8, /* data=*/ 4, /* cs=*/ 7, /* dc=*/ 5, /* reset=*/ 6); // Nokia 5110 Display


//U8X8_SSD1306_128X64_NONAME_4W_SW_SPI u8x8(/* clock=*/ 13, /* data=*/ 11, /* cs=*/ 10, /* dc=*/ 9, /* reset=*/ 8);
//U8X8_SSD1306_128X64_NONAME_4W_HW_SPI u8x8(/* cs=*/ 6, /* dc=*/ 4, /* reset=*/ 12);	// Arduboy (DevKit)
//U8X8_SSD1306_128X64_NONAME_4W_HW_SPI u8x8(/* cs=*/ 12, /* dc=*/ 4, /* reset=*/ 6);	// Arduboy 10 (Production, Kickstarter Edition)
//U8X8_SSD1306_128X64_NONAME_4W_HW_SPI u8x8(/* cs=*/ 10, /* dc=*/ 9, /* reset=*/ 8);
//U8X8_SSD1306_128X64_NONAME_3W_SW_SPI u8x8(/* clock=*/ 13, /* data=*/ 11, /* cs=*/ 10, /* reset=*/ 8);
//U8X8_SSD1306_128X64_NONAME_HW_I2C u8x8(/* reset=*/ U8X8_PIN_NONE);
//U8X8_SSD1306_128X64_NONAME_SW_I2C u8x8(/* clock=*/ 2, /* data=*/ 0, /* reset=*/ U8X8_PIN_NONE); 	      // Digispark ATTiny85
//U8X8_SSD1306_128X64_NONAME_SW_I2C u8x8(/* clock=*/ SCL, /* data=*/ SDA, /* reset=*/ U8X8_PIN_NONE);   // OLEDs without Reset of the Display
//U8X8_SSD1306_128X64_VCOMH0_4W_HW_SPI u8x8(/* cs=*/ 10, /* dc=*/ 9, /* reset=*/ 8);		// same as the NONAME variant, but maximizes setContrast() range
//U8X8_SH1106_128X64_NONAME_4W_HW_SPI u8x8(/* cs=*/ 10, /* dc=*/ 9, /* reset=*/ 8);
//U8X8_SH1106_128X64_VCOMH0_4W_HW_SPI u8x8(/* cs=*/ 10, /* dc=*/ 9, /* reset=*/ 8);		// same as the NONAME variant, but maximizes setContrast() range
//U8X8_SSD1306_128X32_UNIVISION_SW_I2C u8x8(/* clock=*/ SCL, /* data=*/ SDA, /* reset=*/ U8X8_PIN_NONE);   // Adafruit Feather ESP8266/32u4 Boards + FeatherWing OLED
//U8X8_SSD1306_128X32_UNIVISION_SW_I2C u8x8(/* clock=*/ 21, /* data=*/ 20, /* reset=*/ U8X8_PIN_NONE);   // Adafruit Feather M0 Basic Proto + FeatherWing OLED
//U8X8_SSD1306_128X32_UNIVISION_HW_I2C u8x8(/* reset=*/ U8X8_PIN_NONE);   // Adafruit ESP8266/32u4/ARM Boards + FeatherWing OLED
//U8X8_SSD1306_128X32_UNIVISION_HW_I2C u8x8(/* reset=*/ U8X8_PIN_NONE, /* clock=*/ SCL, /* data=*/ SDA);   // pin remapping with ESP8266 HW I2C
//U8X8_SSD1306_64X48_ER_HW_I2C u8x8(/* reset=*/ U8X8_PIN_NONE);   // EastRising 0.66" OLED breakout board, Uno: A4=SDA, A5=SCL, 5V powered
//U8X8_SSD1306_128X64_NONAME_6800 u8x8(13, 11, 2, 3, 4, 5, 6, A4, /*enable=*/ 7, /*cs=*/ 10, /*dc=*/ 9, /*reset=*/ 8);
//U8X8_SSD1306_128X64_NONAME_8080 u8x8(13, 11, 2, 3, 4, 5, 6, A4, /*enable=*/ 7, /*cs=*/ 10, /*dc=*/ 9, /*reset=*/ 8);
//U8X8_SSD1309_128X64_NONAME0_4W_SW_SPI u8x8(/* clock=*/ 13, /* data=*/ 11, /* cs=*/ 10, /* dc=*/ 9, /* reset=*/ 8);
//U8X8_SSD1309_128X64_NONAME0_4W_HW_SPI u8x8(/* cs=*/ 10, /* dc=*/ 9, /* reset=*/ 8);
//U8X8_SSD1309_128X64_NONAME2_4W_SW_SPI u8x8(/* clock=*/ 13, /* data=*/ 11, /* cs=*/ 10, /* dc=*/ 9, /* reset=*/ 8);
//U8X8_SSD1309_128X64_NONAME2_4W_HW_SPI u8x8(/* cs=*/ 10, /* dc=*/ 9, /* reset=*/ 8);
//U8X8_SSD1322_NHD_256X64_4W_SW_SPI u8x8(/* clock=*/ 13, /* data=*/ 11, /* cs=*/ 10, /* dc=*/ 9, /* reset=*/ 8);
//U8X8_SSD1322_NHD_256X64_4W_HW_SPI u8x8(/* cs=*/ 10, /* dc=*/ 9, /* reset=*/ 8);
//U8X8_SSD1325_NHD_128X64_4W_SW_SPI u8x8(/* clock=*/ 13, /* data=*/ 11, /* cs=*/ 10, /* dc=*/ 9, /* reset=*/ 8);
//U8X8_SSD1325_NHD_128X64_4W_HW_SPI u8x8(/* cs=*/ 10, /* dc=*/ 9, /* reset=*/ 8);
//U8X8_SSD1327_SEEED_96X96_SW_I2C u8x8(/* clock=*/ SCL, /* data=*/ SDA, /* reset=*/ U8X8_PIN_NONE);	// Seeedstudio Grove OLED 96x96
//U8X8_SSD1327_SEEED_96X96_HW_I2C u8x8(/* reset=*/ U8X8_PIN_NONE);	// Seeedstudio Grove OLED 96x96
//U8X8_SSD1329_128X96_NONAME_4W_SW_SPI u8x8(/* clock=*/ 13, /* data=*/ 11, /* cs=*/ 10, /* dc=*/ 9, /* reset=*/ 8);
//U8X8_SSD1329_128X96_NONAME_4W_HW_SPI u8x8(/* cs=*/ 10, /* dc=*/ 9, /* reset=*/ 8);
//U8X8_SSD1305_128X32_NONAME_4W_SW_SPI u8x8(/* clock=*/ 13, /* data=*/ 11, /* cs=*/ 10, /* dc=*/ 9, /* reset=*/ 8);
//U8X8_SSD1305_128X32_NONAME_4W_HW_SPI u8x8(/* cs=*/ 10, /* dc=*/ 9, /* reset=*/ 8);
//U8X8_KS0108_128X64 u8x8(8, 9, 10, 11, 4, 5, 6, 7, /*enable=*/ 18, /*dc=*/ 17, /*cs0=*/ 14, /*cs1=*/ 15, /*cs2=*/ U8X8_PIN_NONE, /* reset=*/  U8X8_PIN_NONE); 	// Set R/W to low!
//U8X8_KS0108_ERM19264 u8x8(8, 9, 10, 11, 4, 5, 6, 7, /*enable=*/ 18, /*dc=*/ 17, /*cs0=*/ 14, /*cs1=*/ 15, /*cs2=*/ 16, /* reset=*/  U8X8_PIN_NONE); 	// Set R/W to low!
//U8X8_UC1701_EA_DOGS102_4W_SW_SPI u8x8(/* clock=*/ 13, /* data=*/ 11, /* cs=*/ 10, /* dc=*/ 9, /* reset=*/ 8);
//U8X8_UC1701_EA_DOGS102_4W_HW_SPI u8x8(/* cs=*/ 10, /* dc=*/ 9, /* reset=*/ 8);
//U8X8_PCD8544_84X48_4W_SW_SPI u8x8(/* clock=*/ 13, /* data=*/ 11, /* cs=*/ 10, /* dc=*/ 9, /* reset=*/ 8);	// Nokia 5110 Display
//U8X8_PCD8544_84X48_4W_SW_SPI u8x8(/* clock=*/ 8, /* data=*/ 4, /* cs=*/ 7, /* dc=*/ 5, /* reset=*/ 6); // Nokia 5110 Display


//U8X8_PCD8544_84X48_4W_HW_SPI u8x8(/* cs=*/ 10, /* dc=*/ 9, /* reset=*/ 8);							// Nokia 5110 Display
//U8X8_PCF8812_96X65_4W_SW_SPI u8x8(/* clock=*/ 13, /* data=*/ 11, /* cs=*/ 10, /* dc=*/ 9, /* reset=*/ 8);	// Could be also PCF8814
//U8X8_PCF8812_96X65_4W_HW_SPI u8x8(/* cs=*/ 10, /* dc=*/ 9, /* reset=*/ 8);						// Could be also PCF8814
//U8X8_ST7565_EA_DOGM128_4W_SW_SPI u8x8(/* clock=*/ 13, /* data=*/ 11, /* cs=*/ 10, /* dc=*/ 9, /* reset=*/ 8);
//U8X8_ST7565_EA_DOGM128_4W_HW_SPI u8x8(/* cs=*/ 10, /* dc=*/ 9, /* reset=*/ 8);
//U8X8_ST7565_EA_DOGM132_4W_SW_SPI u8x8(/* clock=*/ 13, /* data=*/ 11, /* cs=*/ 10, /* dc=*/ 9, /* reset=*/ U8X8_PIN_NONE);	// DOGM132 Shield
//U8X8_ST7565_EA_DOGM132_4W_HW_SPI u8x8(/* cs=*/ 10, /* dc=*/ 9, /* reset=*/ U8X8_PIN_NONE);	// DOGM132 Shield
//U8X8_ST7565_ZOLEN_128X64_4W_SW_SPI u8x8(/* clock=*/ 13, /* data=*/ 11, /* cs=*/ 10, /* dc=*/ 9, /* reset=*/ 8);
//U8X8_ST7565_ZOLEN_128X64_4W_HW_SPI u8x8(/* cs=*/ 10, /* dc=*/ 9, /* reset=*/ 8);
//U8X8_ST7565_LM6059_4W_SW_SPI u8x8(/* clock=*/ 13, /* data=*/ 11, /* cs=*/ 10, /* dc=*/ 9, /* reset=*/ 8);	// Adafruit ST7565 GLCD
//U8X8_ST7565_LM6059_4W_HW_SPI u8x8(/* cs=*/ 10, /* dc=*/ 9, /* reset=*/ 8);		// Adafruit ST7565 GLCD
//U8X8_ST7565_ERC12864_4W_SW_SPI u8x8(/* clock=*/ 13, /* data=*/ 11, /* cs=*/ 10, /* dc=*/ 9, /* reset=*/ 8);
//U8X8_ST7565_ERC12864_4W_HW_SPI u8x8(/* cs=*/ 10, /* dc=*/ 9, /* reset=*/ 8);
//U8X8_ST7565_NHD_C12832_4W_SW_SPI u8x8(/* clock=*/ 13, /* data=*/ 11, /* cs=*/ 10, /* dc=*/ 9, /* reset=*/ 8);
//U8X8_ST7565_NHD_C12832_4W_HW_SPI u8x8(/* cs=*/ 10, /* dc=*/ 9, /* reset=*/ 8);
//U8X8_ST7565_NHD_C12864_4W_SW_SPI u8x8(/* clock=*/ 13, /* data=*/ 11, /* cs=*/ 10, /* dc=*/ 9, /* reset=*/ 8);
//U8X8_ST7565_NHD_C12864_4W_HW_SPI u8x8(/* cs=*/ 10, /* dc=*/ 9, /* reset=*/ 8);
//U8X8_ST7567_PI_132X64_4W_SW_SPI u8x8(/* clock=*/ 13, /* data=*/ 11, /* cs=*/ 7, /* dc=*/ 9, /* reset=*/ 8);  // Pax Instruments Shield, LCD_BL=6
//U8X8_ST7567_PI_132X64_4W_HW_SPI u8x8(/* cs=*/ 7, /* dc=*/ 9, /* reset=*/ 8);  // Pax Instruments Shield, LCD_BL=6
//U8X8_NT7534_TG12864R_4W_SW_SPI u8x8(/* clock=*/ 13, /* data=*/ 11, /* cs=*/ 10, /* dc=*/ 9, /* reset=*/ 8);
//U8X8_NT7534_TG12864R_4W_HW_SPI u8x8(/* cs=*/ 10, /* dc=*/ 9, /* reset=*/ 8);
//U8X8_ST7588_JLX12864_SW_I2C u8x8(/* clock=*/ SCL, /* data=*/ SDA, /* reset=*/ 5);
//U8X8_ST7588_JLX12864_HW_I2C u8x8(/* reset=*/ 5);
//U8X8_IST3020_ERC19264_6800 u8x8(44, 43, 42, 41, 40, 39, 38, 37,  /*enable=*/ 28, /*cs=*/ 32, /*dc=*/ 30, /*reset=*/ 31); // Connect WR pin with GND
//U8X8_IST3020_ERC19264_8080 u8x8(44, 43, 42, 41, 40, 39, 38, 37,  /*enable=*/ 29, /*cs=*/ 32, /*dc=*/ 30, /*reset=*/ 31); // Connect RD pin with 3.3V
//U8X8_IST3020_ERC19264_4W_SW_SPI u8x8(/* clock=*/ 13, /* data=*/ 11, /* cs=*/ 10, /* dc=*/ 9, /* reset=*/ 8);
//U8X8_UC1604_JLX19264_4W_SW_SPI u8x8(/* clock=*/ 13, /* data=*/ 11, /* cs=*/ 10, /* dc=*/ 9, /* reset=*/ 8);
//U8X8_UC1604_JLX19264_4W_HW_SPI u8x8(/* cs=*/ 10, /* dc=*/ 9, /* reset=*/ 8);
//U8X8_UC1608_ERC24064_4W_SW_SPI u8x8(/* clock=*/ 13, /* data=*/ 11, /* cs=*/ 10, /* dc=*/ 9, /* reset=*/ 8);  // Due, SW SPI, ERC24064-1 Test Board
//U8X8_UC1608_240X128_4W_SW_SPI u8x8(/* clock=*/ 13, /* data=*/ 11, /* cs=*/ 10, /* dc=*/ 9, /* reset=*/ 8);
//U8X8_UC1610_EA_DOGXL160_4W_SW_SPI u8x8(/* clock=*/ 13, /* data=*/ 11, /* cs=*/ 10, /* dc=*/ 9, /* reset=*/  U8X8_PIN_NONE);
//U8X8_UC1610_EA_DOGXL160_4W_HW_SPI u8x8(/* cs=*/ 10, /* dc=*/ 9, /* reset=*/  U8X8_PIN_NONE);
//U8X8_UC1611_EA_DOGM240_2ND_HW_I2C u8x8(/* reset=*/ 8);	// Due, 2nd I2C, DOGM240 Test Board
//U8X8_UC1611_EA_DOGM240_4W_SW_SPI u8x8(/* clock=*/ 13, /* data=*/ 11, /* cs=*/ 10, /* dc=*/ 9, /* reset=*/ 8);  // SW SPI, Due DOGXL240 Test Board
//U8X8_UC1611_EA_DOGXL240_2ND_HW_I2C u8x8(/* reset=*/ 8);	// Due, 2nd I2C, DOGXL240 Test Board
//U8X8_UC1611_EA_DOGXL240_4W_SW_SPI u8x8(/* clock=*/ 13, /* data=*/ 11, /* cs=*/ 10, /* dc=*/ 9, /* reset=*/ 8);  // SW SPI, Due DOGXL240 Test Board
//U8X8_SSD1606_172X72_4W_SW_SPI u8x8(/* clock=*/ 13, /* data=*/ 11, /* cs=*/ 10, /* dc=*/ 9, /* reset=*/ 8);	// eInk/ePaper Display
//U8X8_SSD1607_200X200_4W_SW_SPI u8x8(/* clock=*/ 13, /* data=*/ 11, /* cs=*/ 10, /* dc=*/ 9, /* reset=*/ 8);	// eInk/ePaper Display

// End of constructor list


void setup(void)
{
  /* U8g2 Project: SSD1306 Test Board */
  //pinMode(10, OUTPUT);
  //pinMode(9, OUTPUT);
  //digitalWrite(10, 0);
  //digitalWrite(9, 0);

  /* U8g2 Project: KS0108 Test Board */
  //pinMode(16, OUTPUT);
  //digitalWrite(16, 0);

  u8x8.begin();
  u8x8.setPowerSave(0);


}

void loop(void)
{
  u8x8.setFont(u8x8_font_5x7_f);
  u8x8.drawString(0,1,"Hello World!");
  for(;;);
  u8x8.refreshDisplay();		// for SSD1606/7
  //delay(2000);

  /*
  delay(1000);
  u8x8.setPowerSave(1);
  delay(1000);
  u8x8.setPowerSave(0);
  delay(1000);
  */
}
HelloWorld.ino
/*

  HelloWorld.ino

  Universal 8bit Graphics Library (https://github.com/olikraus/u8g2/)

  Copyright (c) 2016, olikraus@gmail.com
  All rights reserved.

  Redistribution and use in source and binary forms, with or without modification,
  are permitted provided that the following conditions are met:

  * Redistributions of source code must retain the above copyright notice, this list
    of conditions and the following disclaimer.

  * Redistributions in binary form must reproduce the above copyright notice, this
    list of conditions and the following disclaimer in the documentation and/or other
    materials provided with the distribution.

  THIS SOFTWARE IS PROVIDED BY THE COPYRIGHT HOLDERS AND
  CONTRIBUTORS "AS IS" AND ANY EXPRESS OR IMPLIED WARRANTIES,
  INCLUDING, BUT NOT LIMITED TO, THE IMPLIED WARRANTIES OF
  MERCHANTABILITY AND FITNESS FOR A PARTICULAR PURPOSE ARE
  DISCLAIMED. IN NO EVENT SHALL THE COPYRIGHT HOLDER OR
  CONTRIBUTORS BE LIABLE FOR ANY DIRECT, INDIRECT, INCIDENTAL,
  SPECIAL, EXEMPLARY, OR CONSEQUENTIAL DAMAGES (INCLUDING, BUT
  NOT LIMITED TO, PROCUREMENT OF SUBSTITUTE GOODS OR SERVICES;
  LOSS OF USE, DATA, OR PROFITS; OR BUSINESS INTERRUPTION) HOWEVER
  CAUSED AND ON ANY THEORY OF LIABILITY, WHETHER IN CONTRACT,
  STRICT LIABILITY, OR TORT (INCLUDING NEGLIGENCE OR OTHERWISE)
  ARISING IN ANY WAY OUT OF THE USE OF THIS SOFTWARE, EVEN IF
  ADVISED OF THE POSSIBILITY OF SUCH DAMAGE.

*/

#include <Arduino.h>
#include <U8g2lib.h>

#ifdef U8X8_HAVE_HW_SPI
#include <SPI.h>
#endif
#ifdef U8X8_HAVE_HW_I2C
#include <Wire.h>
#endif

/*
  U8glib Example Overview:
    Frame Buffer Examples: clearBuffer/sendBuffer. Fast, but may not work with all Arduino boards because of RAM consumption
    Page Buffer Examples: firstPage/nextPage. Less RAM usage, should work with all Arduino boards.
    U8x8 Text Only Example: No RAM usage, direct communication with display controller. No graphics, 8x8 Text only.

*/

// Please UNCOMMENT one of the contructor lines below
// U8g2 Contructor List (Frame Buffer)
// The complete list is available here: https://github.com/olikraus/u8g2/wiki/u8g2setupcpp
// Please update the pin numbers according to your setup. Use U8X8_PIN_NONE if the reset pin is not connected
//U8G2_SSD1306_128X64_NONAME_F_4W_SW_SPI u8g2(U8G2_R0, /* clock=*/ 13, /* data=*/ 11, /* cs=*/ 10, /* dc=*/ 9, /* reset=*/ 8);
//U8G2_SSD1306_128X64_NONAME_F_4W_HW_SPI u8g2(U8G2_R0, /* cs=*/ 12, /* dc=*/ 4, /* reset=*/ 6);	// Arduboy (Production, Kickstarter Edition)
//U8G2_SSD1306_128X64_NONAME_F_4W_HW_SPI u8g2(U8G2_R0, /* cs=*/ 10, /* dc=*/ 9, /* reset=*/ 8);
//U8G2_SSD1306_128X64_NONAME_F_3W_SW_SPI u8g2(U8G2_R0, /* clock=*/ 13, /* data=*/ 11, /* cs=*/ 10, /* reset=*/ 8);
//U8G2_SSD1306_128X64_NONAME_F_HW_I2C u8g2(U8G2_R0, /* reset=*/ U8X8_PIN_NONE);
//U8G2_SSD1306_128X64_NONAME_F_SW_I2C u8g2(U8G2_R0, /* clock=*/ 13, /* data=*/ 11, /* reset=*/ 8);
//U8G2_SSD1306_128X64_NONAME_F_SW_I2C u8g2(U8G2_R0, /* clock=*/ SCL, /* data=*/ SDA, /* reset=*/ U8X8_PIN_NONE);   // All Boards without Reset of the Display
//U8G2_SSD1306_128X64_NONAME_F_6800 u8g2(U8G2_R0, 13, 11, 2, 3, 4, 5, 6, A4, /*enable=*/ 7, /*cs=*/ 10, /*dc=*/ 9, /*reset=*/ 8);
//U8G2_SSD1306_128X64_NONAME_F_8080 u8g2(U8G2_R0, 13, 11, 2, 3, 4, 5, 6, A4, /*enable=*/ 7, /*cs=*/ 10, /*dc=*/ 9, /*reset=*/ 8);
//U8G2_SSD1306_128X64_VCOMH0_F_4W_HW_SPI u8g2(U8G2_R0, /* cs=*/ 10, /* dc=*/ 9, /* reset=*/ 8);	// same as the NONAME variant, but maximizes setContrast() range
//U8G2_SH1106_128X64_NONAME_F_4W_HW_SPI u8g2(U8G2_R0, /* cs=*/ 10, /* dc=*/ 9, /* reset=*/ 8);
//U8G2_SH1106_128X64_VCOMH0_F_4W_HW_SPI u8g2(U8G2_R0, /* cs=*/ 10, /* dc=*/ 9, /* reset=*/ 8);		// same as the NONAME variant, but maximizes setContrast() range
//U8G2_SSD1306_128X32_UNIVISION_F_SW_I2C u8g2(U8G2_R0, /* clock=*/ 21, /* data=*/ 20, /* reset=*/ U8X8_PIN_NONE);   // Adafruit Feather M0 Basic Proto + FeatherWing OLED
//U8G2_SSD1306_128X32_UNIVISION_F_SW_I2C u8g2(U8G2_R0, /* clock=*/ SCL, /* data=*/ SDA, /* reset=*/ U8X8_PIN_NONE);   // Adafruit Feather ESP8266/32u4 Boards + FeatherWing OLED
//U8G2_SSD1306_128X32_UNIVISION_F_HW_I2C u8g2(U8G2_R0, /* reset=*/ U8X8_PIN_NONE);  // Adafruit ESP8266/32u4/ARM Boards + FeatherWing OLED
//U8G2_SSD1306_128X32_UNIVISION_F_HW_I2C u8g2(U8G2_R0, /* reset=*/ U8X8_PIN_NONE, /* clock=*/ SCL, /* data=*/ SDA);   // pin remapping with ESP8266 HW I2C
//U8G2_SSD1306_64X48_ER_F_HW_I2C u8g2(U8G2_R0, /* reset=*/ U8X8_PIN_NONE);   // EastRising 0.66" OLED breakout board, Uno: A4=SDA, A5=SCL, 5V powered
//U8G2_SSD1322_NHD_256X64_F_4W_SW_SPI u8g2(U8G2_R0, /* clock=*/ 13, /* data=*/ 11, /* cs=*/ 10, /* dc=*/ 9, /* reset=*/ 8);	// Enable U8G2_16BIT in u8g2.h
//U8G2_SSD1322_NHD_256X64_F_4W_HW_SPI u8g2(U8G2_R0, /* cs=*/ 10, /* dc=*/ 9, /* reset=*/ 8);	// Enable U8G2_16BIT in u8g2.h
//U8G2_SSD1325_NHD_128X64_F_4W_SW_SPI u8g2(U8G2_R0, /* clock=*/ 13, /* data=*/ 11, /* cs=*/ 10, /* dc=*/ 9, /* reset=*/ 8);
//U8G2_SSD1325_NHD_128X64_F_4W_HW_SPI u8g2(U8G2_R0, /* cs=*/ 10, /* dc=*/ 9, /* reset=*/ 8);
//U8G2_SSD1327_SEEED_96X96_F_SW_I2C u8g2(U8G2_R0, /* clock=*/ SCL, /* data=*/ SDA, /* reset=*/ U8X8_PIN_NONE);	// Seeedstudio Grove OLED 96x96
//U8G2_SSD1327_SEEED_96X96_F_HW_I2C u8g2(U8G2_R0, /* reset=*/ U8X8_PIN_NONE);	// Seeedstudio Grove OLED 96x96
//U8G2_SSD1329_128X96_NONAME_F_4W_SW_SPI u8g2(U8G2_R0, /* clock=*/ 13, /* data=*/ 11, /* cs=*/ 10, /* dc=*/ 9, /* reset=*/ 8);
//U8G2_SSD1329_128X96_NONAME_F_4W_HW_SPI u8g2(U8G2_R0, /* cs=*/ 10, /* dc=*/ 9, /* reset=*/ 8);
//U8G2_SSD1305_128X32_NONAME_F_4W_SW_SPI u8g2(U8G2_R0, /* clock=*/ 13, /* data=*/ 11, /* cs=*/ 10, /* dc=*/ 9, /* reset=*/ 8);
//U8G2_SSD1305_128X32_NONAME_F_4W_HW_SPI u8g2(U8G2_R0, /* cs=*/ 10, /* dc=*/ 9, /* reset=*/ 8);
//U8G2_SSD1309_128X64_NONAME0_F_4W_SW_SPI u8g2(U8G2_R0, /* clock=*/ 13, /* data=*/ 11, /* cs=*/ 10, /* dc=*/ 9, /* reset=*/ 8);
//U8G2_SSD1309_128X64_NONAME0_F_4W_HW_SPI u8g2(U8G2_R0, /* cs=*/ 10, /* dc=*/ 9, /* reset=*/ 8);
//U8G2_SSD1309_128X64_NONAME2_F_4W_SW_SPI u8g2(U8G2_R0, /* clock=*/ 13, /* data=*/ 11, /* cs=*/ 10, /* dc=*/ 9, /* reset=*/ 8);
//U8G2_SSD1309_128X64_NONAME2_F_4W_HW_SPI u8g2(U8G2_R0, /* cs=*/ 10, /* dc=*/ 9, /* reset=*/ 8);
//U8G2_LD7032_60X32_F_4W_SW_SPI u8g2(U8G2_R0, /* clock=*/ 11, /* data=*/ 12, /* cs=*/ 9, /* dc=*/ 10, /* reset=*/ 8);	// SW SPI Nano Board
//U8G2_LD7032_60X32_F_4W_SW_I2C u8g2(U8G2_R0, /* clock=*/ 11, /* data=*/ 12, /* reset=*/ U8X8_PIN_NONE);	// NOT TESTED!
//U8G2_UC1701_EA_DOGS102_F_4W_SW_SPI u8g2(U8G2_R0, /* clock=*/ 13, /* data=*/ 11, /* cs=*/ 10, /* dc=*/ 9, /* reset=*/ 8);
//U8G2_UC1701_EA_DOGS102_F_4W_HW_SPI u8g2(U8G2_R0, /* cs=*/ 10, /* dc=*/ 9, /* reset=*/ 8);

//U8G2_PCD8544_84X48_F_4W_SW_SPI u8g2(U8G2_R0, /* clock=*/ 13, /* data=*/ 11, /* cs=*/ 10, /* dc=*/ 9, /* reset=*/ 8);  // Nokia 5110 Display
U8G2_PCD8544_84X48_F_4W_SW_SPI u8g2(U8G2_R0, /* clock=*/ 8, /* data=*/ 4, /* cs=*/ 7, /* dc=*/ 5, /* reset=*/ 6);  // Nokia 5110 Display

//U8G2_PCD8544_84X48_F_4W_HW_SPI u8g2(U8G2_R0, /* cs=*/ 10, /* dc=*/ 9, /* reset=*/ 8); 		// Nokia 5110 Display
//U8G2_PCF8812_96X65_F_4W_SW_SPI u8g2(U8G2_R0, /* clock=*/ 13, /* data=*/ 11, /* cs=*/ 10, /* dc=*/ 9, /* reset=*/ 8);	// Could be also PCF8814
//U8G2_PCF8812_96X65_F_4W_HW_SPI u8g2(U8G2_R0, /* cs=*/ 10, /* dc=*/ 9, /* reset=*/ 8);						// Could be also PCF8814
//U8G2_KS0108_128X64_F u8g2(U8G2_R0, 8, 9, 10, 11, 4, 5, 6, 7, /*enable=*/ 18, /*dc=*/ 17, /*cs0=*/ 14, /*cs1=*/ 15, /*cs2=*/ U8X8_PIN_NONE, /* reset=*/  U8X8_PIN_NONE); 	// Set R/W to low!
//U8G2_KS0108_ERM19264_F u8g2(U8G2_R0, 8, 9, 10, 11, 4, 5, 6, 7, /*enable=*/ 18, /*dc=*/ 17, /*cs0=*/ 14, /*cs1=*/ 15, /*cs2=*/ 16, /* reset=*/  U8X8_PIN_NONE); 	// Set R/W to low!
//U8G2_ST7920_192X32_F_8080 u8g2(U8G2_R0, 8, 9, 10, 11, 4, 5, 6, 7, /*enable=*/ 18, /*cs=*/ U8X8_PIN_NONE, /*dc=*/ 17, /*reset=*/ U8X8_PIN_NONE);
//U8G2_ST7920_192X32_F_SW_SPI u8g2(U8G2_R0, /* clock=*/ 18 /* A4 */ , /* data=*/ 16 /* A2 */, /* CS=*/ 17 /* A3 */, /* reset=*/ U8X8_PIN_NONE);
//U8G2_ST7920_128X64_F_8080 u8g2(U8G2_R0, 8, 9, 10, 11, 4, 5, 6, 7, /*enable=*/ 18 /* A4 */, /*cs=*/ U8X8_PIN_NONE, /*dc/rs=*/ 17 /* A3 */, /*reset=*/ 15 /* A1 */);	// Remember to set R/W to 0
//U8G2_ST7920_128X64_F_SW_SPI u8g2(U8G2_R0, /* clock=*/ 18 /* A4 */ , /* data=*/ 16 /* A2 */, /* CS=*/ 17 /* A3 */, /* reset=*/ U8X8_PIN_NONE);
//U8G2_ST7920_128X64_F_SW_SPI u8g2(U8G2_R0, /* clock=*/ 13, /* data=*/ 11, /* CS=*/ 10, /* reset=*/ 8);
//U8G2_ST7920_128X64_F_HW_SPI u8g2(U8G2_R0, /* CS=*/ 10, /* reset=*/ 8);
//U8G2_ST7565_EA_DOGM128_F_4W_SW_SPI u8g2(U8G2_R0, /* clock=*/ 13, /* data=*/ 11, /* cs=*/ 10, /* dc=*/ 9, /* reset=*/ 8);
//U8G2_ST7565_EA_DOGM128_F_4W_HW_SPI u8g2(U8G2_R0, /* cs=*/ 10, /* dc=*/ 9, /* reset=*/ 8);
//U8G2_ST7565_EA_DOGM132_F_4W_SW_SPI u8g2(U8G2_R0, /* clock=*/ 13, /* data=*/ 11, /* cs=*/ 10, /* dc=*/ 9, /* reset=*/ U8X8_PIN_NONE);	// DOGM132 Shield
//U8G2_ST7565_EA_DOGM132_F_4W_HW_SPI u8g2(U8G2_R0, /* cs=*/ 10, /* dc=*/ 9, /* reset=*/ U8X8_PIN_NONE);	// DOGM132 Shield
//U8G2_ST7565_ZOLEN_128X64_F_4W_SW_SPI u8g2(U8G2_R0, /* clock=*/ 13, /* data=*/ 11, /* cs=*/ 10, /* dc=*/ 9, /* reset=*/ 8);
//U8G2_ST7565_ZOLEN_128X64_F_4W_HW_SPI u8g2(U8G2_R0, /* cs=*/ 10, /* dc=*/ 9, /* reset=*/ 8);
//U8G2_ST7565_LM6059_F_4W_SW_SPI u8g2(U8G2_R0, /* clock=*/ 13, /* data=*/ 11, /* cs=*/ 10, /* dc=*/ 9, /* reset=*/ 8);		// Adafruit ST7565 GLCD
//U8G2_ST7565_LM6059_F_4W_HW_SPI u8g2(U8G2_R0, /* cs=*/ 10, /* dc=*/ 9, /* reset=*/ 8);		// Adafruit ST7565 GLCD
//U8G2_ST7565_ERC12864_F_4W_SW_SPI u8g2(U8G2_R0, /* clock=*/ 13, /* data=*/ 11, /* cs=*/ 10, /* dc=*/ 9, /* reset=*/ 8);
//U8G2_ST7565_ERC12864_F_4W_HW_SPI u8g2(U8G2_R0, /* cs=*/ 10, /* dc=*/ 9, /* reset=*/ 8);
//U8G2_ST7565_NHD_C12832_F_4W_SW_SPI u8g2(U8G2_R0, /* clock=*/ 13, /* data=*/ 11, /* cs=*/ 10, /* dc=*/ 9, /* reset=*/ 8);
//U8G2_ST7565_NHD_C12832_F_4W_HW_SPI u8g2(U8G2_R0, /* cs=*/ 10, /* dc=*/ 9, /* reset=*/ 8);
//U8G2_ST7565_NHD_C12864_F_4W_SW_SPI u8g2(U8G2_R0, /* clock=*/ 13, /* data=*/ 11, /* cs=*/ 10, /* dc=*/ 9, /* reset=*/ 8);
//U8G2_ST7565_NHD_C12864_F_4W_HW_SPI u8g2(U8G2_R0, /* cs=*/ 10, /* dc=*/ 9, /* reset=*/ 8);
//U8G2_ST7567_PI_132X64_F_4W_SW_SPI u8g2(U8G2_R0, /* clock=*/ 13, /* data=*/ 11, /* cs=*/ 7, /* dc=*/ 9, /* reset=*/ 8);  // Pax Instruments Shield, LCD_BL=6
//U8G2_ST7567_PI_132X64_F_4W_HW_SPI u8g2(U8G2_R0, /* cs=*/ 7, /* dc=*/ 9, /* reset=*/ 8);  // Pax Instruments Shield, LCD_BL=6
//U8G2_NT7534_TG12864R_F_4W_SW_SPI u8g2(U8G2_R0, /* clock=*/ 13, /* data=*/ 11, /* cs=*/ 10, /* dc=*/ 9, /* reset=*/ 8);
//U8G2_NT7534_TG12864R_F_4W_HW_SPI u8g2(U8G2_R0, /* cs=*/ 10, /* dc=*/ 9, /* reset=*/ 8);
//U8G2_ST7588_JLX12864_F_SW_I2C u8g2(U8G2_R0, /* clock=*/ SCL, /* data=*/ SDA, /* reset=*/ 5);
//U8G2_ST7588_JLX12864_F_HW_I2C u8g2(U8G2_R0, /* reset=*/ 5);
//U8G2_IST3020_ERC19264_F_6800 u8g2(U8G2_R0, 44, 43, 42, 41, 40, 39, 38, 37,  /*enable=*/ 28, /*cs=*/ 32, /*dc=*/ 30, /*reset=*/ 31); // Connect WR pin with GND
//U8G2_IST3020_ERC19264_F_8080 u8g2(U8G2_R0, 44, 43, 42, 41, 40, 39, 38, 37,  /*enable=*/ 29, /*cs=*/ 32, /*dc=*/ 30, /*reset=*/ 31); // Connect RD pin with 3.3V
//U8G2_IST3020_ERC19264_F_4W_SW_SPI u8g2(U8G2_R0, /* clock=*/ 13, /* data=*/ 11, /* cs=*/ 10, /* dc=*/ 9, /* reset=*/ 8);
//U8G2_LC7981_160X80_F_6800 u8g2(U8G2_R0, 8, 9, 10, 11, 4, 5, 6, 7, /*enable=*/ 18, /*cs=*/ 14, /*dc=*/ 15, /*reset=*/ 16); // Connect RW with GND
//U8G2_LC7981_160X160_F_6800 u8g2(U8G2_R0, 8, 9, 10, 11, 4, 5, 6, 7, /*enable=*/ 18, /*cs=*/ 14, /*dc=*/ 15, /*reset=*/ 16); // Connect RW with GND
//U8G2_LC7981_240X128_F_6800 u8g2(U8G2_R0, 8, 9, 10, 11, 4, 5, 6, 7, /*enable=*/ 18, /*cs=*/ 14, /*dc=*/ 15, /*reset=*/ 16); // Connect RW with GND
//U8G2_T6963_240X128_F_8080 u8g2(U8G2_R0, 8, 9, 10, 11, 4, 5, 6, 7, /*enable=*/ 17, /*cs=*/ 14, /*dc=*/ 15, /*reset=*/ 16); // Connect RD with +5V, FS0 and FS1 with GND
//U8G2_T6963_256X64_F_8080 u8g2(U8G2_R0, 8, 9, 10, 11, 4, 5, 6, 7, /*enable=*/ 17, /*cs=*/ 14, /*dc=*/ 15, /*reset=*/ 16); // Connect RD with +5V, FS0 and FS1 with GND
//U8G2_SED1330_240X128_F_8080 u8g2(U8G2_R0, 8, 9, 10, 11, 4, 5, 6, 7, /*enable=*/ 17, /*cs=*/ 14, /*dc=*/ 15, /*reset=*/ 16); // Connect RD with +5V, FG with GND
//U8G2_SED1330_240X128_F_6800 u8g2(U8G2_R0, 13, 11, 2, 3, 4, 5, 6, A4, /*enable=*/ 7, /*cs=*/ 10, /*dc=*/ 9, /*reset=*/ 8); // A0 is dc pin!
//U8G2_RA8835_NHD_240X128_F_8080 u8g2(U8G2_R0, 8, 9, 10, 11, 4, 5, 6, 7, /*enable=*/ 17, /*cs=*/ 14, /*dc=*/ 15, /*reset=*/ 16); // Connect /RD = E with +5V, enable is /WR = RW, FG with GND, 14=Uno Pin A0
//U8G2_RA8835_NHD_240X128_F_6800 u8g2(U8G2_R0, 8, 9, 10, 11, 4, 5, 6, 7,  /*enable=*/ 17, /*cs=*/ 14, /*dc=*/ 15, /*reset=*/ 16); // A0 is dc pin, /WR = RW = GND, enable is /RD = E
//U8G2_UC1604_JLX19264_F_4W_SW_SPI u8g2(U8G2_R0, /* clock=*/ 13, /* data=*/ 11, /* cs=*/ 10, /* dc=*/ 9, /* reset=*/ 8);
//U8G2_UC1604_JLX19264_F_4W_HW_SPI u8g2(U8G2_R0, /* cs=*/ 10, /* dc=*/ 9, /* reset=*/ 8);
//U8G2_UC1608_ERC24064_F_4W_SW_SPI u8g2(U8G2_R0, /* clock=*/ 13, /* data=*/ 11, /* cs=*/ 10, /* dc=*/ 9, /* reset=*/ 8);  // SW SPI, Due ERC24064-1 Test Setup
//U8G2_UC1608_240X128_F_4W_SW_SPI u8g2(U8G2_R0, /* clock=*/ 13, /* data=*/ 11, /* cs=*/ 10, /* dc=*/ 9, /* reset=*/ 8);  // SW SPI, Due ERC24064-1 Test Setup
//U8G2_UC1610_EA_DOGXL160_F_4W_SW_SPI u8g2(U8G2_R0, /* clock=*/ 13, /* data=*/ 11, /* cs=*/ 10, /* dc=*/ 9, /* reset=*/  U8X8_PIN_NONE);
//U8G2_UC1610_EA_DOGXL160_F_4W_HW_SPI u8g2(U8G2_R0, /* cs=*/ 10, /* dc=*/ 9, /* reset=*/  U8X8_PIN_NONE);
//U8G2_UC1611_EA_DOGM240_F_2ND_HW_I2C u8g2(U8G2_R0, /* reset=*/ 8);	// Due, 2nd I2C, DOGM240 Test Board
//U8G2_UC1611_EA_DOGM240_F_4W_SW_SPI u8g2(U8G2_R0, /* clock=*/ 13, /* data=*/ 11, /* cs=*/ 10, /* dc=*/ 9, /* reset=*/ 8);   // Due, SW SPI, DOGXL240 Test Board
//U8G2_UC1611_EA_DOGXL240_F_2ND_HW_I2C u8g2(U8G2_R0, /* reset=*/ 8);	// Due, 2nd I2C, DOGXL240 Test Board
//U8G2_UC1611_EA_DOGXL240_F_4W_SW_SPI u8g2(U8G2_R0, /* clock=*/ 13, /* data=*/ 11, /* cs=*/ 10, /* dc=*/ 9, /* reset=*/ 8);   // Due, SW SPI, DOGXL240 Test Board
//U8G2_SSD1606_172X72_F_4W_SW_SPI u8g2(U8G2_R0, /* clock=*/ 13, /* data=*/ 11, /* cs=*/ 10, /* dc=*/ 9, /* reset=*/ 8);		// eInk/ePaper Display
//U8G2_SSD1607_200X200_F_4W_SW_SPI u8g2(U8G2_R0, /* clock=*/ 13, /* data=*/ 11, /* cs=*/ 10, /* dc=*/ 9, /* reset=*/ 8);	// eInk/ePaper Display

// End of constructor list


void setup(void) {
  u8g2.begin();
}

void loop(void) {
  u8g2.clearBuffer();					// clear the internal memory
//  u8g2.setFont(u8g2_font_ncenB14_tr);	// choose a suitable font
  u8g2.setFont(u8g2_font_crox3tb_tf);  // choose a suitable font

  u8g2.drawStr(0,20,"Hello World!");	// write something to the internal memory
  u8g2.sendBuffer();					// transfer internal memory to the display
  delay(1000);
}
GraphicsTest.ino
/*

  GraphicsTest.ino

  Universal 8bit Graphics Library (https://github.com/olikraus/u8g2/)

  Copyright (c) 2016, olikraus@gmail.com
  All rights reserved.

  Redistribution and use in source and binary forms, with or without modification,
  are permitted provided that the following conditions are met:

  * Redistributions of source code must retain the above copyright notice, this list
    of conditions and the following disclaimer.

  * Redistributions in binary form must reproduce the above copyright notice, this
    list of conditions and the following disclaimer in the documentation and/or other
    materials provided with the distribution.

  THIS SOFTWARE IS PROVIDED BY THE COPYRIGHT HOLDERS AND
  CONTRIBUTORS "AS IS" AND ANY EXPRESS OR IMPLIED WARRANTIES,
  INCLUDING, BUT NOT LIMITED TO, THE IMPLIED WARRANTIES OF
  MERCHANTABILITY AND FITNESS FOR A PARTICULAR PURPOSE ARE
  DISCLAIMED. IN NO EVENT SHALL THE COPYRIGHT HOLDER OR
  CONTRIBUTORS BE LIABLE FOR ANY DIRECT, INDIRECT, INCIDENTAL,
  SPECIAL, EXEMPLARY, OR CONSEQUENTIAL DAMAGES (INCLUDING, BUT
  NOT LIMITED TO, PROCUREMENT OF SUBSTITUTE GOODS OR SERVICES;
  LOSS OF USE, DATA, OR PROFITS; OR BUSINESS INTERRUPTION) HOWEVER
  CAUSED AND ON ANY THEORY OF LIABILITY, WHETHER IN CONTRACT,
  STRICT LIABILITY, OR TORT (INCLUDING NEGLIGENCE OR OTHERWISE)
  ARISING IN ANY WAY OUT OF THE USE OF THIS SOFTWARE, EVEN IF
  ADVISED OF THE POSSIBILITY OF SUCH DAMAGE.

*/

#include <Arduino.h>
#include <U8g2lib.h>

#ifdef U8X8_HAVE_HW_SPI
#include <SPI.h>
#endif
#ifdef U8X8_HAVE_HW_I2C
#include <Wire.h>
#endif


/*
  U8glib Example Overview:
    Frame Buffer Examples: clearBuffer/sendBuffer. Fast, but may not work with all Arduino boards because of RAM consumption
    Page Buffer Examples: firstPage/nextPage. Less RAM usage, should work with all Arduino boards.
    U8x8 Text Only Example: No RAM usage, direct communication with display controller. No graphics, 8x8 Text only.

*/

// Please UNCOMMENT one of the contructor lines below
// U8g2 Contructor List (Frame Buffer)
// The complete list is available here: https://github.com/olikraus/u8g2/wiki/u8g2setupcpp
// Please update the pin numbers according to your setup. Use U8X8_PIN_NONE if the reset pin is not connected
//U8G2_SSD1306_128X64_NONAME_F_4W_SW_SPI u8g2(U8G2_R0, /* clock=*/ 13, /* data=*/ 11, /* cs=*/ 10, /* dc=*/ 9, /* reset=*/ 8);
//U8G2_SSD1306_128X64_NONAME_F_4W_HW_SPI u8g2(U8G2_R0, /* cs=*/ 12, /* dc=*/ 4, /* reset=*/ 6);	// Arduboy (Production, Kickstarter Edition)
//U8G2_SSD1306_128X64_NONAME_F_4W_HW_SPI u8g2(U8G2_R0, /* cs=*/ 10, /* dc=*/ 9, /* reset=*/ 8);
//U8G2_SSD1306_128X64_NONAME_F_3W_SW_SPI u8g2(U8G2_R0, /* clock=*/ 13, /* data=*/ 11, /* cs=*/ 10, /* reset=*/ 8);
//U8G2_SSD1306_128X64_NONAME_F_HW_I2C u8g2(U8G2_R0, /* reset=*/ U8X8_PIN_NONE);
//U8G2_SSD1306_128X64_NONAME_F_SW_I2C u8g2(U8G2_R0, /* clock=*/ 13, /* data=*/ 11, /* reset=*/ 8);
//U8G2_SSD1306_128X64_NONAME_F_SW_I2C u8g2(U8G2_R0, /* clock=*/ SCL, /* data=*/ SDA, /* reset=*/ U8X8_PIN_NONE);   // All Boards without Reset of the Display
//U8G2_SSD1306_128X64_NONAME_F_6800 u8g2(U8G2_R0, 13, 11, 2, 3, 4, 5, 6, A4, /*enable=*/ 7, /*cs=*/ 10, /*dc=*/ 9, /*reset=*/ 8);
//U8G2_SSD1306_128X64_NONAME_F_8080 u8g2(U8G2_R0, 13, 11, 2, 3, 4, 5, 6, A4, /*enable=*/ 7, /*cs=*/ 10, /*dc=*/ 9, /*reset=*/ 8);
//U8G2_SSD1306_128X64_VCOMH0_F_4W_HW_SPI u8g2(U8G2_R0, /* cs=*/ 10, /* dc=*/ 9, /* reset=*/ 8);	// same as the NONAME variant, but maximizes setContrast() range
//U8G2_SH1106_128X64_NONAME_F_4W_HW_SPI u8g2(U8G2_R0, /* cs=*/ 10, /* dc=*/ 9, /* reset=*/ 8);
//U8G2_SH1106_128X64_VCOMH0_F_4W_HW_SPI u8g2(U8G2_R0, /* cs=*/ 10, /* dc=*/ 9, /* reset=*/ 8);		// same as the NONAME variant, but maximizes setContrast() range
//U8G2_SSD1306_128X32_UNIVISION_F_SW_I2C u8g2(U8G2_R0, /* clock=*/ 21, /* data=*/ 20, /* reset=*/ U8X8_PIN_NONE);   // Adafruit Feather M0 Basic Proto + FeatherWing OLED
//U8G2_SSD1306_128X32_UNIVISION_F_SW_I2C u8g2(U8G2_R0, /* clock=*/ SCL, /* data=*/ SDA, /* reset=*/ U8X8_PIN_NONE);   // Adafruit Feather ESP8266/32u4 Boards + FeatherWing OLED
//U8G2_SSD1306_128X32_UNIVISION_F_HW_I2C u8g2(U8G2_R0, /* reset=*/ U8X8_PIN_NONE);  // Adafruit ESP8266/32u4/ARM Boards + FeatherWing OLED
//U8G2_SSD1306_128X32_UNIVISION_F_HW_I2C u8g2(U8G2_R0, /* reset=*/ U8X8_PIN_NONE, /* clock=*/ SCL, /* data=*/ SDA);   // pin remapping with ESP8266 HW I2C
//U8G2_SSD1306_64X48_ER_F_HW_I2C u8g2(U8G2_R0, /* reset=*/ U8X8_PIN_NONE);   // EastRising 0.66" OLED breakout board, Uno: A4=SDA, A5=SCL, 5V powered
//U8G2_SSD1322_NHD_256X64_F_4W_SW_SPI u8g2(U8G2_R0, /* clock=*/ 13, /* data=*/ 11, /* cs=*/ 10, /* dc=*/ 9, /* reset=*/ 8);	// Enable U8G2_16BIT in u8g2.h
//U8G2_SSD1322_NHD_256X64_F_4W_HW_SPI u8g2(U8G2_R0, /* cs=*/ 10, /* dc=*/ 9, /* reset=*/ 8);	// Enable U8G2_16BIT in u8g2.h
//U8G2_SSD1325_NHD_128X64_F_4W_SW_SPI u8g2(U8G2_R0, /* clock=*/ 13, /* data=*/ 11, /* cs=*/ 10, /* dc=*/ 9, /* reset=*/ 8);
//U8G2_SSD1325_NHD_128X64_F_4W_HW_SPI u8g2(U8G2_R0, /* cs=*/ 10, /* dc=*/ 9, /* reset=*/ 8);
//U8G2_SSD1327_SEEED_96X96_F_SW_I2C u8g2(U8G2_R0, /* clock=*/ SCL, /* data=*/ SDA, /* reset=*/ U8X8_PIN_NONE);	// Seeedstudio Grove OLED 96x96
//U8G2_SSD1327_SEEED_96X96_F_HW_I2C u8g2(U8G2_R0, /* reset=*/ U8X8_PIN_NONE);	// Seeedstudio Grove OLED 96x96
//U8G2_SSD1329_128X96_NONAME_F_4W_SW_SPI u8g2(U8G2_R0, /* clock=*/ 13, /* data=*/ 11, /* cs=*/ 10, /* dc=*/ 9, /* reset=*/ 8);
//U8G2_SSD1329_128X96_NONAME_F_4W_HW_SPI u8g2(U8G2_R0, /* cs=*/ 10, /* dc=*/ 9, /* reset=*/ 8);
//U8G2_SSD1305_128X32_NONAME_F_4W_SW_SPI u8g2(U8G2_R0, /* clock=*/ 13, /* data=*/ 11, /* cs=*/ 10, /* dc=*/ 9, /* reset=*/ 8);
//U8G2_SSD1305_128X32_NONAME_F_4W_HW_SPI u8g2(U8G2_R0, /* cs=*/ 10, /* dc=*/ 9, /* reset=*/ 8);
//U8G2_SSD1309_128X64_NONAME0_F_4W_SW_SPI u8g2(U8G2_R0, /* clock=*/ 13, /* data=*/ 11, /* cs=*/ 10, /* dc=*/ 9, /* reset=*/ 8);
//U8G2_SSD1309_128X64_NONAME0_F_4W_HW_SPI u8g2(U8G2_R0, /* cs=*/ 10, /* dc=*/ 9, /* reset=*/ 8);
//U8G2_SSD1309_128X64_NONAME2_F_4W_SW_SPI u8g2(U8G2_R0, /* clock=*/ 13, /* data=*/ 11, /* cs=*/ 10, /* dc=*/ 9, /* reset=*/ 8);
//U8G2_SSD1309_128X64_NONAME2_F_4W_HW_SPI u8g2(U8G2_R0, /* cs=*/ 10, /* dc=*/ 9, /* reset=*/ 8);
//U8G2_LD7032_60X32_F_4W_SW_SPI u8g2(U8G2_R0, /* clock=*/ 11, /* data=*/ 12, /* cs=*/ 9, /* dc=*/ 10, /* reset=*/ 8);	// SW SPI Nano Board
//U8G2_LD7032_60X32_F_4W_SW_I2C u8g2(U8G2_R0, /* clock=*/ 11, /* data=*/ 12, /* reset=*/ U8X8_PIN_NONE);	// NOT TESTED!
//U8G2_UC1701_EA_DOGS102_F_4W_SW_SPI u8g2(U8G2_R0, /* clock=*/ 13, /* data=*/ 11, /* cs=*/ 10, /* dc=*/ 9, /* reset=*/ 8);
//U8G2_UC1701_EA_DOGS102_F_4W_HW_SPI u8g2(U8G2_R0, /* cs=*/ 10, /* dc=*/ 9, /* reset=*/ 8);

U8G2_PCD8544_84X48_F_4W_SW_SPI u8g2(U8G2_R0, /* clock=*/ 8, /* data=*/ 4, /* cs=*/ 7, /* dc=*/ 5, /* reset=*/ 6);  // Nokia 5110 Display

//U8G2_PCD8544_84X48_F_4W_HW_SPI u8g2(U8G2_R0, /* cs=*/ 10, /* dc=*/ 9, /* reset=*/ 8); 		// Nokia 5110 Display
//U8G2_PCF8812_96X65_F_4W_SW_SPI u8g2(U8G2_R0, /* clock=*/ 13, /* data=*/ 11, /* cs=*/ 10, /* dc=*/ 9, /* reset=*/ 8);	// Could be also PCF8814
//U8G2_PCF8812_96X65_F_4W_HW_SPI u8g2(U8G2_R0, /* cs=*/ 10, /* dc=*/ 9, /* reset=*/ 8);						// Could be also PCF8814
//U8G2_KS0108_128X64_F u8g2(U8G2_R0, 8, 9, 10, 11, 4, 5, 6, 7, /*enable=*/ 18, /*dc=*/ 17, /*cs0=*/ 14, /*cs1=*/ 15, /*cs2=*/ U8X8_PIN_NONE, /* reset=*/  U8X8_PIN_NONE); 	// Set R/W to low!
//U8G2_KS0108_ERM19264_F u8g2(U8G2_R0, 8, 9, 10, 11, 4, 5, 6, 7, /*enable=*/ 18, /*dc=*/ 17, /*cs0=*/ 14, /*cs1=*/ 15, /*cs2=*/ 16, /* reset=*/  U8X8_PIN_NONE); 	// Set R/W to low!
//U8G2_ST7920_192X32_F_8080 u8g2(U8G2_R0, 8, 9, 10, 11, 4, 5, 6, 7, /*enable=*/ 18, /*cs=*/ U8X8_PIN_NONE, /*dc=*/ 17, /*reset=*/ U8X8_PIN_NONE);
//U8G2_ST7920_192X32_F_SW_SPI u8g2(U8G2_R0, /* clock=*/ 18 /* A4 */ , /* data=*/ 16 /* A2 */, /* CS=*/ 17 /* A3 */, /* reset=*/ U8X8_PIN_NONE);
//U8G2_ST7920_128X64_F_8080 u8g2(U8G2_R0, 8, 9, 10, 11, 4, 5, 6, 7, /*enable=*/ 18 /* A4 */, /*cs=*/ U8X8_PIN_NONE, /*dc/rs=*/ 17 /* A3 */, /*reset=*/ 15 /* A1 */);	// Remember to set R/W to 0
//U8G2_ST7920_128X64_F_SW_SPI u8g2(U8G2_R0, /* clock=*/ 18 /* A4 */ , /* data=*/ 16 /* A2 */, /* CS=*/ 17 /* A3 */, /* reset=*/ U8X8_PIN_NONE);
//U8G2_ST7920_128X64_F_SW_SPI u8g2(U8G2_R0, /* clock=*/ 13, /* data=*/ 11, /* CS=*/ 10, /* reset=*/ 8);
//U8G2_ST7920_128X64_F_HW_SPI u8g2(U8G2_R0, /* CS=*/ 10, /* reset=*/ 8);
//U8G2_ST7565_EA_DOGM128_F_4W_SW_SPI u8g2(U8G2_R0, /* clock=*/ 13, /* data=*/ 11, /* cs=*/ 10, /* dc=*/ 9, /* reset=*/ 8);
//U8G2_ST7565_EA_DOGM128_F_4W_HW_SPI u8g2(U8G2_R0, /* cs=*/ 10, /* dc=*/ 9, /* reset=*/ 8);
//U8G2_ST7565_EA_DOGM132_F_4W_SW_SPI u8g2(U8G2_R0, /* clock=*/ 13, /* data=*/ 11, /* cs=*/ 10, /* dc=*/ 9, /* reset=*/ U8X8_PIN_NONE);	// DOGM132 Shield
//U8G2_ST7565_EA_DOGM132_F_4W_HW_SPI u8g2(U8G2_R0, /* cs=*/ 10, /* dc=*/ 9, /* reset=*/ U8X8_PIN_NONE);	// DOGM132 Shield
//U8G2_ST7565_ZOLEN_128X64_F_4W_SW_SPI u8g2(U8G2_R0, /* clock=*/ 13, /* data=*/ 11, /* cs=*/ 10, /* dc=*/ 9, /* reset=*/ 8);
//U8G2_ST7565_ZOLEN_128X64_F_4W_HW_SPI u8g2(U8G2_R0, /* cs=*/ 10, /* dc=*/ 9, /* reset=*/ 8);
//U8G2_ST7565_LM6059_F_4W_SW_SPI u8g2(U8G2_R0, /* clock=*/ 13, /* data=*/ 11, /* cs=*/ 10, /* dc=*/ 9, /* reset=*/ 8);		// Adafruit ST7565 GLCD
//U8G2_ST7565_LM6059_F_4W_HW_SPI u8g2(U8G2_R0, /* cs=*/ 10, /* dc=*/ 9, /* reset=*/ 8);		// Adafruit ST7565 GLCD
//U8G2_ST7565_ERC12864_F_4W_SW_SPI u8g2(U8G2_R0, /* clock=*/ 13, /* data=*/ 11, /* cs=*/ 10, /* dc=*/ 9, /* reset=*/ 8);
//U8G2_ST7565_ERC12864_F_4W_HW_SPI u8g2(U8G2_R0, /* cs=*/ 10, /* dc=*/ 9, /* reset=*/ 8);
//U8G2_ST7565_NHD_C12832_F_4W_SW_SPI u8g2(U8G2_R0, /* clock=*/ 13, /* data=*/ 11, /* cs=*/ 10, /* dc=*/ 9, /* reset=*/ 8);
//U8G2_ST7565_NHD_C12832_F_4W_HW_SPI u8g2(U8G2_R0, /* cs=*/ 10, /* dc=*/ 9, /* reset=*/ 8);
//U8G2_ST7565_NHD_C12864_F_4W_SW_SPI u8g2(U8G2_R0, /* clock=*/ 13, /* data=*/ 11, /* cs=*/ 10, /* dc=*/ 9, /* reset=*/ 8);
//U8G2_ST7565_NHD_C12864_F_4W_HW_SPI u8g2(U8G2_R0, /* cs=*/ 10, /* dc=*/ 9, /* reset=*/ 8);
//U8G2_ST7567_PI_132X64_F_4W_SW_SPI u8g2(U8G2_R0, /* clock=*/ 13, /* data=*/ 11, /* cs=*/ 7, /* dc=*/ 9, /* reset=*/ 8);  // Pax Instruments Shield, LCD_BL=6
//U8G2_ST7567_PI_132X64_F_4W_HW_SPI u8g2(U8G2_R0, /* cs=*/ 7, /* dc=*/ 9, /* reset=*/ 8);  // Pax Instruments Shield, LCD_BL=6
//U8G2_NT7534_TG12864R_F_4W_SW_SPI u8g2(U8G2_R0, /* clock=*/ 13, /* data=*/ 11, /* cs=*/ 10, /* dc=*/ 9, /* reset=*/ 8);
//U8G2_NT7534_TG12864R_F_4W_HW_SPI u8g2(U8G2_R0, /* cs=*/ 10, /* dc=*/ 9, /* reset=*/ 8);
//U8G2_ST7588_JLX12864_F_SW_I2C u8g2(U8G2_R0, /* clock=*/ SCL, /* data=*/ SDA, /* reset=*/ 5);
//U8G2_ST7588_JLX12864_F_HW_I2C u8g2(U8G2_R0, /* reset=*/ 5);
//U8G2_IST3020_ERC19264_F_6800 u8g2(U8G2_R0, 44, 43, 42, 41, 40, 39, 38, 37,  /*enable=*/ 28, /*cs=*/ 32, /*dc=*/ 30, /*reset=*/ 31); // Connect WR pin with GND
//U8G2_IST3020_ERC19264_F_8080 u8g2(U8G2_R0, 44, 43, 42, 41, 40, 39, 38, 37,  /*enable=*/ 29, /*cs=*/ 32, /*dc=*/ 30, /*reset=*/ 31); // Connect RD pin with 3.3V
//U8G2_IST3020_ERC19264_F_4W_SW_SPI u8g2(U8G2_R0, /* clock=*/ 13, /* data=*/ 11, /* cs=*/ 10, /* dc=*/ 9, /* reset=*/ 8);
//U8G2_LC7981_160X80_F_6800 u8g2(U8G2_R0, 8, 9, 10, 11, 4, 5, 6, 7, /*enable=*/ 18, /*cs=*/ 14, /*dc=*/ 15, /*reset=*/ 16); // Connect RW with GND
//U8G2_LC7981_160X160_F_6800 u8g2(U8G2_R0, 8, 9, 10, 11, 4, 5, 6, 7, /*enable=*/ 18, /*cs=*/ 14, /*dc=*/ 15, /*reset=*/ 16); // Connect RW with GND
//U8G2_LC7981_240X128_F_6800 u8g2(U8G2_R0, 8, 9, 10, 11, 4, 5, 6, 7, /*enable=*/ 18, /*cs=*/ 14, /*dc=*/ 15, /*reset=*/ 16); // Connect RW with GND
//U8G2_T6963_240X128_F_8080 u8g2(U8G2_R0, 8, 9, 10, 11, 4, 5, 6, 7, /*enable=*/ 17, /*cs=*/ 14, /*dc=*/ 15, /*reset=*/ 16); // Connect RD with +5V, FS0 and FS1 with GND
//U8G2_T6963_256X64_F_8080 u8g2(U8G2_R0, 8, 9, 10, 11, 4, 5, 6, 7, /*enable=*/ 17, /*cs=*/ 14, /*dc=*/ 15, /*reset=*/ 16); // Connect RD with +5V, FS0 and FS1 with GND
//U8G2_SED1330_240X128_F_8080 u8g2(U8G2_R0, 8, 9, 10, 11, 4, 5, 6, 7, /*enable=*/ 17, /*cs=*/ 14, /*dc=*/ 15, /*reset=*/ 16); // Connect RD with +5V, FG with GND
//U8G2_SED1330_240X128_F_6800 u8g2(U8G2_R0, 13, 11, 2, 3, 4, 5, 6, A4, /*enable=*/ 7, /*cs=*/ 10, /*dc=*/ 9, /*reset=*/ 8); // A0 is dc pin!
//U8G2_RA8835_NHD_240X128_F_8080 u8g2(U8G2_R0, 8, 9, 10, 11, 4, 5, 6, 7, /*enable=*/ 17, /*cs=*/ 14, /*dc=*/ 15, /*reset=*/ 16); // Connect /RD = E with +5V, enable is /WR = RW, FG with GND, 14=Uno Pin A0
//U8G2_RA8835_NHD_240X128_F_6800 u8g2(U8G2_R0, 8, 9, 10, 11, 4, 5, 6, 7,  /*enable=*/ 17, /*cs=*/ 14, /*dc=*/ 15, /*reset=*/ 16); // A0 is dc pin, /WR = RW = GND, enable is /RD = E
//U8G2_UC1604_JLX19264_F_4W_SW_SPI u8g2(U8G2_R0, /* clock=*/ 13, /* data=*/ 11, /* cs=*/ 10, /* dc=*/ 9, /* reset=*/ 8);
//U8G2_UC1604_JLX19264_F_4W_HW_SPI u8g2(U8G2_R0, /* cs=*/ 10, /* dc=*/ 9, /* reset=*/ 8);
//U8G2_UC1608_ERC24064_F_4W_SW_SPI u8g2(U8G2_R0, /* clock=*/ 13, /* data=*/ 11, /* cs=*/ 10, /* dc=*/ 9, /* reset=*/ 8);  // SW SPI, Due ERC24064-1 Test Setup
//U8G2_UC1608_240X128_F_4W_SW_SPI u8g2(U8G2_R0, /* clock=*/ 13, /* data=*/ 11, /* cs=*/ 10, /* dc=*/ 9, /* reset=*/ 8);  // SW SPI, Due ERC24064-1 Test Setup
//U8G2_UC1610_EA_DOGXL160_F_4W_SW_SPI u8g2(U8G2_R0, /* clock=*/ 13, /* data=*/ 11, /* cs=*/ 10, /* dc=*/ 9, /* reset=*/  U8X8_PIN_NONE);
//U8G2_UC1610_EA_DOGXL160_F_4W_HW_SPI u8g2(U8G2_R0, /* cs=*/ 10, /* dc=*/ 9, /* reset=*/  U8X8_PIN_NONE);
//U8G2_UC1611_EA_DOGM240_F_2ND_HW_I2C u8g2(U8G2_R0, /* reset=*/ 8);	// Due, 2nd I2C, DOGM240 Test Board
//U8G2_UC1611_EA_DOGM240_F_4W_SW_SPI u8g2(U8G2_R0, /* clock=*/ 13, /* data=*/ 11, /* cs=*/ 10, /* dc=*/ 9, /* reset=*/ 8);   // Due, SW SPI, DOGXL240 Test Board
//U8G2_UC1611_EA_DOGXL240_F_2ND_HW_I2C u8g2(U8G2_R0, /* reset=*/ 8);	// Due, 2nd I2C, DOGXL240 Test Board
//U8G2_UC1611_EA_DOGXL240_F_4W_SW_SPI u8g2(U8G2_R0, /* clock=*/ 13, /* data=*/ 11, /* cs=*/ 10, /* dc=*/ 9, /* reset=*/ 8);   // Due, SW SPI, DOGXL240 Test Board
//U8G2_SSD1606_172X72_F_4W_SW_SPI u8g2(U8G2_R0, /* clock=*/ 13, /* data=*/ 11, /* cs=*/ 10, /* dc=*/ 9, /* reset=*/ 8);		// eInk/ePaper Display
//U8G2_SSD1607_200X200_F_4W_SW_SPI u8g2(U8G2_R0, /* clock=*/ 13, /* data=*/ 11, /* cs=*/ 10, /* dc=*/ 9, /* reset=*/ 8);	// eInk/ePaper Display

// End of constructor list


void u8g2_prepare(void) {
  u8g2.setFont(u8g2_font_6x10_tf);
  u8g2.setFontRefHeightExtendedText();
  u8g2.setDrawColor(1);
  u8g2.setFontPosTop();
  u8g2.setFontDirection(0);
}

void u8g2_box_frame(uint8_t a) {
  u8g2.drawStr( 0, 0, "drawBox");
  u8g2.drawBox(5,10,20,10);
  u8g2.drawBox(10+a,15,30,7);
  u8g2.drawStr( 0, 30, "drawFrame");
  u8g2.drawFrame(5,10+30,20,10);
  u8g2.drawFrame(10+a,15+30,30,7);
}

void u8g2_disc_circle(uint8_t a) {
  u8g2.drawStr( 0, 0, "drawDisc");
  u8g2.drawDisc(10,18,9);
  u8g2.drawDisc(24+a,16,7);
  u8g2.drawStr( 0, 30, "drawCircle");
  u8g2.drawCircle(10,18+30,9);
  u8g2.drawCircle(24+a,16+30,7);
}

void u8g2_r_frame(uint8_t a) {
  u8g2.drawStr( 0, 0, "drawRFrame/Box");
  u8g2.drawRFrame(5, 10,40,30, a+1);
  u8g2.drawRBox(50, 10,25,40, a+1);
}

void u8g2_string(uint8_t a) {
  u8g2.setFontDirection(0);
  u8g2.drawStr(30+a,31, " 0");
  u8g2.setFontDirection(1);
  u8g2.drawStr(30,31+a, " 90");
  u8g2.setFontDirection(2);
  u8g2.drawStr(30-a,31, " 180");
  u8g2.setFontDirection(3);
  u8g2.drawStr(30,31-a, " 270");
}

void u8g2_line(uint8_t a) {
  u8g2.drawStr( 0, 0, "drawLine");
  u8g2.drawLine(7+a, 10, 40, 55);
  u8g2.drawLine(7+a*2, 10, 60, 55);
  u8g2.drawLine(7+a*3, 10, 80, 55);
  u8g2.drawLine(7+a*4, 10, 100, 55);
}

void u8g2_triangle(uint8_t a) {
  uint16_t offset = a;
  u8g2.drawStr( 0, 0, "drawTriangle");
  u8g2.drawTriangle(14,7, 45,30, 10,40);
  u8g2.drawTriangle(14+offset,7-offset, 45+offset,30-offset, 57+offset,10-offset);
  u8g2.drawTriangle(57+offset*2,10, 45+offset*2,30, 86+offset*2,53);
  u8g2.drawTriangle(10+offset,40+offset, 45+offset,30+offset, 86+offset,53+offset);
}

void u8g2_ascii_1() {
  char s[2] = " ";
  uint8_t x, y;
  u8g2.drawStr( 0, 0, "ASCII page 1");
  for( y = 0; y < 6; y++ ) {
    for( x = 0; x < 16; x++ ) {
      s[0] = y*16 + x + 32;
      u8g2.drawStr(x*7, y*10+10, s);
    }
  }
}

void u8g2_ascii_2() {
  char s[2] = " ";
  uint8_t x, y;
  u8g2.drawStr( 0, 0, "ASCII page 2");
  for( y = 0; y < 6; y++ ) {
    for( x = 0; x < 16; x++ ) {
      s[0] = y*16 + x + 160;
      u8g2.drawStr(x*7, y*10+10, s);
    }
  }
}

void u8g2_extra_page(uint8_t a)
{
  u8g2.drawStr( 0, 0, "Unicode");
  u8g2.setFont(u8g2_font_unifont_t_symbols);
  u8g2.setFontPosTop();
  u8g2.drawUTF8(0, 24, "☀ ☁");
  switch(a) {
    case 0:
    case 1:
    case 2:
    case 3:
      u8g2.drawUTF8(a*3, 36, "☂");
      break;
    case 4:
    case 5:
    case 6:
    case 7:
      u8g2.drawUTF8(a*3, 36, "☔");
      break;
  }
}

#define cross_width 24
#define cross_height 24
static const unsigned char cross_bits[] U8X8_PROGMEM  = {
  0x00, 0x18, 0x00, 0x00, 0x24, 0x00, 0x00, 0x24, 0x00, 0x00, 0x42, 0x00,
  0x00, 0x42, 0x00, 0x00, 0x42, 0x00, 0x00, 0x81, 0x00, 0x00, 0x81, 0x00,
  0xC0, 0x00, 0x03, 0x38, 0x3C, 0x1C, 0x06, 0x42, 0x60, 0x01, 0x42, 0x80,
  0x01, 0x42, 0x80, 0x06, 0x42, 0x60, 0x38, 0x3C, 0x1C, 0xC0, 0x00, 0x03,
  0x00, 0x81, 0x00, 0x00, 0x81, 0x00, 0x00, 0x42, 0x00, 0x00, 0x42, 0x00,
  0x00, 0x42, 0x00, 0x00, 0x24, 0x00, 0x00, 0x24, 0x00, 0x00, 0x18, 0x00, };

#define cross_fill_width 24
#define cross_fill_height 24
static const unsigned char cross_fill_bits[] U8X8_PROGMEM  = {
  0x00, 0x00, 0x00, 0x00, 0x00, 0x00, 0x18, 0x00, 0x18, 0x64, 0x00, 0x26,
  0x84, 0x00, 0x21, 0x08, 0x81, 0x10, 0x08, 0x42, 0x10, 0x10, 0x3C, 0x08,
  0x20, 0x00, 0x04, 0x40, 0x00, 0x02, 0x80, 0x00, 0x01, 0x80, 0x18, 0x01,
  0x80, 0x18, 0x01, 0x80, 0x00, 0x01, 0x40, 0x00, 0x02, 0x20, 0x00, 0x04,
  0x10, 0x3C, 0x08, 0x08, 0x42, 0x10, 0x08, 0x81, 0x10, 0x84, 0x00, 0x21,
  0x64, 0x00, 0x26, 0x18, 0x00, 0x18, 0x00, 0x00, 0x00, 0x00, 0x00, 0x00, };

#define cross_block_width 14
#define cross_block_height 14
static const unsigned char cross_block_bits[] U8X8_PROGMEM  = {
  0xFF, 0x3F, 0x01, 0x20, 0x01, 0x20, 0x01, 0x20, 0x01, 0x20, 0x01, 0x20,
  0xC1, 0x20, 0xC1, 0x20, 0x01, 0x20, 0x01, 0x20, 0x01, 0x20, 0x01, 0x20,
  0x01, 0x20, 0xFF, 0x3F, };

void u8g2_bitmap_overlay(uint8_t a) {
  uint8_t frame_size = 28;

  u8g2.drawStr(0, 0, "Bitmap overlay");

  u8g2.drawStr(0, frame_size + 12, "Solid / transparent");
  u8g2.setBitmapMode(false /* solid */);
  u8g2.drawFrame(0, 10, frame_size, frame_size);
  u8g2.drawXBMP(2, 12, cross_width, cross_height, cross_bits);
  if(a & 4)
    u8g2.drawXBMP(7, 17, cross_block_width, cross_block_height, cross_block_bits);

  u8g2.setBitmapMode(true /* transparent*/);
  u8g2.drawFrame(frame_size + 5, 10, frame_size, frame_size);
  u8g2.drawXBMP(frame_size + 7, 12, cross_width, cross_height, cross_bits);
  if(a & 4)
    u8g2.drawXBMP(frame_size + 12, 17, cross_block_width, cross_block_height, cross_block_bits);
}

void u8g2_bitmap_modes(uint8_t transparent) {
  const uint8_t frame_size = 24;

  u8g2.drawBox(0, frame_size * 0.5, frame_size * 5, frame_size);
  u8g2.drawStr(frame_size * 0.5, 50, "Black");
  u8g2.drawStr(frame_size * 2, 50, "White");
  u8g2.drawStr(frame_size * 3.5, 50, "XOR");

  if(!transparent) {
    u8g2.setBitmapMode(false /* solid */);
    u8g2.drawStr(0, 0, "Solid bitmap");
  } else {
    u8g2.setBitmapMode(true /* transparent*/);
    u8g2.drawStr(0, 0, "Transparent bitmap");
  }
  u8g2.setDrawColor(0);// Black
  u8g2.drawXBMP(frame_size * 0.5, 24, cross_width, cross_height, cross_bits);
  u8g2.setDrawColor(1); // White
  u8g2.drawXBMP(frame_size * 2, 24, cross_width, cross_height, cross_bits);
  u8g2.setDrawColor(2); // XOR
  u8g2.drawXBMP(frame_size * 3.5, 24, cross_width, cross_height, cross_bits);
}

uint8_t draw_state = 0;

void draw(void) {
  u8g2_prepare();
  switch(draw_state >> 3) {
    case 0: u8g2_box_frame(draw_state&7); break;
    case 1: u8g2_disc_circle(draw_state&7); break;
    case 2: u8g2_r_frame(draw_state&7); break;
    case 3: u8g2_string(draw_state&7); break;
    case 4: u8g2_line(draw_state&7); break;
    case 5: u8g2_triangle(draw_state&7); break;
    case 6: u8g2_ascii_1(); break;
    case 7: u8g2_ascii_2(); break;
    case 8: u8g2_extra_page(draw_state&7); break;
    case 9: u8g2_bitmap_modes(0); break;
    case 10: u8g2_bitmap_modes(1); break;
    case 11: u8g2_bitmap_overlay(draw_state&7); break;
  }
}


void setup(void) {
  u8g2.begin();
}

void loop(void) {
  // picture loop
  u8g2.clearBuffer();
  draw();
  u8g2.sendBuffer();

  // increase the state
  draw_state++;
  if ( draw_state >= 12*8 )
    draw_state = 0;

  // deley between each page
  delay(100);

}
baghayi/Nokia_5110
A little bit of a history:
Nokia 5110 LCD was meant to be used in one of my projects yet to fail. Not having thoroughly read its datasheet, started looking for drivers and libraries to get it up and running as quickly as I could, but failed dramatically.
Target Platforms
Currently, it is written to be used with Arduino platform.
How to use it, then?
First, you need to copy or clone this library into your Arduino’s
librariesfolder so that you can address it in your Arduino programs.To do that, you can either download and move this library into
librariesfolder, or if you have Git installed in your computer then you can go tolibrariesfolder and clone this library intolibrariesfolder (which is a way of downloading).In order to download this library, there is a
Downloadbutton in this page, somewhere :), by clicking on it you can download the library, then unzip and finally move it tolibrariesfolder.To clone it, you open a terminal or console window in the
librariesfolder then typegit clone REPO_URL(replace REPO_URL, with repository’s link which is located in this page somewhere), then hit enter and after it is completly downloaded, you are good to go.Then, you need to include this library in your program in order to use it. To achieve this, add this piece of code in top of your program:
#include "Nokia_5110.h"Now, its time to instantiate Nokia_5110 class to have access to its APIs. Which is also a way of telling the driver which pins of LCD is associated with I/O pins of Micro-controller. How do we do that? easy:
In
setupfunction of your program, or outside of it, create a variable to hold Nokia_5110 class’ object:
Nokia_5110 lcd = Nokia_5110(RST, CE, DC, DIN, CLK);in this case variable is called
lcd. And as you can see, Nokia_5110’s constructor needs 5 parameters.
- RST is for lcd’s reset pin.
- CE is for lcd’s chip enable pin.
- DC is for lcd’s Command/Data pin.
- DIN is for lcd’s data in pin.
- CLK is for lcd’s clock pin.
You need to pass the constructor, digital pin numbers of arduino to which LCD pins are connected.
At this point, if everything goes as planned, you should be able to access this driver’s APIs (meaning, being able to call its methods, functions) in you program.
So, let me list and explain each and every API availabe in your program by this driver (Nokia_5110.h).
Public APIs
- void setContrast(unsigned short value);This method allows us to change LCD’s contrast.It accepts a value between 0 and 127 (0 >= value <= 127) as its parameter.By default, in the driver, contrast value is set to 60. If it is not satisfactory, you can easily change it using
setContrastmethod.- void setTemperatureCoefficient(unsigned short value);This method allows us to set temperature coefficient. As stated in the datashee, in lower temperatures, LCD’s controlling voltage needs to be increased to make it work properly. Which is what this method is for. (Please refere to PCD8544 driver’s datasheet for more information on this topic.)This method accepts a value between 0 and 3 (0 >= value <= 3) as its parameter.
- void print(value);
- void print(value, format);
- void println(value);
- void println(value, format);These methods lets us display information on the LCD. It prints data that is passed to its parameter on the LCD.At the moment, English upper and lower characters are supported. Numbers and some other characters are supported as well. For the list of supported characters please refer to the
src/Font.hfile.Note: In case of unknown characters, question mark (?) will be displayed, instead.printlnmethod works exactly likehttps://www.arduino.cc/en/Serial/Print- void clear();Clears the display and then moves the cursor to the first row and column.
- void clear(position inRow, position fromColumn, position toColumn);This method is for when you only want to clear a portion of the LCD.First parameter,
inRowaccepts a value between 0 and 5 as an indication of the row number. Second parameter,fromColumnis the beginning of a portion you want to start clearing from. And the third parameter,toColumnis the end of the column, you want to be cleared. So, from the start to the end of the specified column, in the specified row, will be cleared.Second and third parameter accepts a value between 0 to 83.Note that, third parameter,toColumn, is included in the clearing process, and that column’s data will be removed as well.Note: After clearing process is done, cursor will be moved to thefromColumncolumn. So that you would not need to manually set the cursor after clearing, if all you want is to clear and print some other data in the place of the previous one.- void setCursor(position x, position y);This method is for specifying cursor position. Like when you want to write some characters on the middle of the screen, you can use this method to jump to the middle of the screen, by passing it the exact location, and then you can start printing characters right there.first parameter,
x, accepts a value between 0 and 83 (column). and second parameter,y, accepts a value between 0 and 5 (row).- void setDisplayMode(display_mode mode);As stated in the datasheet, LCD has four different display modes. One is for normal mode. One for blank display. One for turning all display’s segments on. And the last one is inverse video.This method as its parameter expects a hex value. But it is not nice, is it? :D. For ease of use, driver has four constants defined with respective display mode hex values as their values. So you only need to pass those constant as parameter value instead of hex values.Defined constants for display mode are as follows:
Display_Mode::BLANKis for a blank display.
Display_Mode::NORMALis normal mode, which by default is set by the driver.
Display_Mode::ALL_SEGMENTS_ONfor turning all segments (pixels) on.
Display_Mode::INVERSE_VIDEOIn normal mode, you have black text in a white background. This mode is the inverse of normal mode (white text in a black background).
- void setBiasSystem(mux_rate rate);This method is for system biasing. For setting the view angle. By default by the driver it is set to
Mux_Rate::FORTY, but you can change it any time you want. Not to mention that by changing it, you may also need to change the contrast value of the display.LikesetDisplayModeyou need to pass a hex value as its parameter, but for ease of use, for all of available biasing hex values, constant values is defined. List of constants are as follows:
Mux_Rate::HUNDRED
Mux_Rate::EIGHTY
Mux_Rate::SIXTY_FIVE
Mux_Rate::FORTY_EIGHT
Mux_Rate::FORTY
Mux_Rate::TWENTY_FOUR
Mux_Rate::EIGHTEEN
Mux_Rate::TENFor more information on this topic, please refer to datasheet.
About the development of this driver
There are things I would love to add to this driver, but until I need them in my projects I might not work on them, so appologies in advance 😀 .
Some of the thins are:
- adding comma (,) to the font file. Which I had forgotten to do so when developing this driver.
- returning current cursor position after printing, from the
printlnmethods. So if you need to move a bit further in a row (meaning moving cursor in the X position) and then print new characters, you wouldn’t have to guess what column to set the cursor. You could easily add some random (:D) number to the current cursor position to avoid printing on the already printed charcters. and probably a new method for separately requesting cursor position without the need of calling print methods.- Supporting right to left languages.
- Bigger font sizes.
- And then, living happily ever after.
#include "Nokia_5110.h"

// #define RST 2
// #define CE 3
// #define DC 4
// #define DIN 5
// #define CLK 6


#define RST 6
#define CE 7
#define DC 5
#define DIN 4
#define CLK 8

Nokia_5110 lcd = Nokia_5110(RST, CE, DC, DIN, CLK);


void setup() {
    lcd.setContrast(70); // 60 is the default value set by the driver
}

void loop() {
    lcd.clear();
    lcd.println("`setContrast` method lets you change the LCD's Contrast.");
    delay(8000);

    lcd.clear();
    lcd.println("It accepts a value between 0 and 127 (0 >= value <= 127)");
    delay(8000);
}
#include "Nokia_5110.h"

// #define RST 2
// #define CE 3
// #define DC 4
// #define DIN 5
// #define CLK 6


#define RST 6
#define CE 7
#define DC 5
#define DIN 4
#define CLK 8

Nokia_5110 lcd = Nokia_5110(RST, CE, DC, DIN, CLK);


void setup() {
    /**
     * Note: if instead of text being shown on the display, all the segments are on, you may need to decrease contrast value.
     */
    //lcd.setContrast(60); // 60 is the default value set by the driver

    lcd.print("Please Wait ...");
    delay(1000);
    lcd.clear();

    lcd.print("Hi there");
    lcd.println(":D");

    lcd.setCursor(0, 5);
    lcd.println("1 2 3 ...");
}

void loop() {}
#include "Nokia_5110.h"

// #define RST 2
// #define CE 3
// #define DC 4
// #define DIN 5
// #define CLK 6


#define RST 6
#define CE 7
#define DC 5
#define DIN 4
#define CLK 8

Nokia_5110 lcd = Nokia_5110(RST, CE, DC, DIN, CLK);

void setup() {
    lcd.setCursor(5, 2);
	lcd.print("Clear methods");
	delay(4000);

	/**
	 * Clear method with no parameter, clears the whole sceen and then sets the cursor to the first row and first column. X=0, Y=0 .
	 */
	lcd.clear(); // One way of using clear method.

	lcd.setCursor(15, 2);
    lcd.print("Timer");

	lcd.setCursor(15, 3);
    lcd.print("00 : 00 : 00");
}


void hours(){
    static unsigned int hours = 0;

    if(hours <= 22){
        hours++;
    }else{
        hours = 0;
    }

    lcd.clear(3, 15, 25); // This is another way of using clear method. It only clears a portion of the screen
    lcd.print(hours);
}

void minutes(){
    static unsigned int minutes = 0;

    if(minutes <= 58){
        minutes++;
    }else{
        minutes = 0;
        hours();
    }

    lcd.clear(3, 36, 46); // This is another way of using clear method. It only clears a portion of the screen
    lcd.print(minutes);
}

void seconds(){
    static unsigned int seconds = 0;

    if(seconds <= 58) {
        seconds++;
    }else{
        seconds = 0;
        minutes();
    }

    lcd.clear(3, 57, 70); // This is another way of using clear method. It only clears a portion of the screen
    lcd.print(seconds);
}

void timer(){
	static unsigned long timerState = 0;
	unsigned long timer = (millis() / 1000);
    if(timer != timerState){
        timerState = timer;
        seconds();
    }
}

void loop() {
    timer();
}
Library: LCD5110_Basic
These displays were used in old Nokia 5110/3310 cell phones. It is a 84×48 pixel monochrome LCD display. These displays are small, but very readable and come with backlight. This display is made of 84×48 individual pixels, so you can use it for graphics, text or bitmaps. These displays are inexpensive, easy to use, require only a few digital I/O pins and are fairly low power as well
To drive the display, you will need 5 digital output pins. Another pin can be used to control (via on/off or PWM) the backlight, but the library has no support for this function.
The display driver is a PCD8544 chip, and it runs at 3.3V so you will need a 3V supply handy. Logic levels must be 3V to prevent damage so you must use some kind of levelshifter.
This library uses an SPI-like software protocol and does require exclusive access to the pins used. You will not be able to share pins with other SPI devices.
LCD5110_NumberFonts
// LCD5110_NumberFonts
// Copyright (C)2015 Rinky-Dink Electronics, Henning Karlsen. All right reserved
// web: http://www.RinkyDinkElectronics.com/
//
// This program is a demo of the included number-fonts,
// and how to use them.
//
// This program requires a Nokia 5110 LCD module.
//
// It is assumed that the LCD module is connected to
// the following pins using a levelshifter to get the
// correct voltage to the module.
//      SCK  - Pin 8
//      MOSI - Pin 9
//      DC   - Pin 10
//      RST  - Pin 11
//      CS   - Pin 12
//


#include <LCD5110_Basic.h>

// #define RST 6
// #define CE 7
// #define DC 5
// #define DIN 4
// #define CLK 8
// LCD5110(int SCK, int MOSI, int DC, int RST, int CS);
// LCD5110 myGLCD(8,9,10,11,12);

LCD5110 myGLCD(8,4,5,6,7);


extern uint8_t SmallFont[];
extern uint8_t MediumNumbers[];
extern uint8_t BigNumbers[];

void setup()
{
  myGLCD.InitLCD();
}

void loop()
{
  for (int i=0; i<=100; i++)
  {
    myGLCD.setFont(MediumNumbers);
    myGLCD.printNumF(float(i)/3, 2, RIGHT, 0);
    myGLCD.setFont(BigNumbers);
    myGLCD.printNumI(i, RIGHT, 24);
    delay(200);
  }

  myGLCD.setFont(SmallFont);
  myGLCD.print("|            |", CENTER, 16);
  delay(500);
  for (int i=0; i<12; i++)
  {
    myGLCD.print("\\", 6+(i*6), 16);
    delay(500);
  }
  myGLCD.clrScr();

  delay(1000);
}
LCD5110_ViewFont
// LCD5110_ViewFont
// Copyright (C)2015 Rinky-Dink Electronics, Henning Karlsen. All right reserved
// web: http://www.RinkyDinkElectronics.com/
//
// This program is a demo of the included full font.
//
// This program requires a Nokia 5110 LCD module.
//
// It is assumed that the LCD module is connected to
// the following pins using a levelshifter to get the
// correct voltage to the module.
//      SCK  - Pin 8
//      MOSI - Pin 9
//      DC   - Pin 10
//      RST  - Pin 11
//      CS   - Pin 12
//

#include <LCD5110_Basic.h>

// #define RST 6
// #define CE 7
// #define DC 5
// #define DIN 4
// #define CLK 8
// LCD5110(int SCK, int MOSI, int DC, int RST, int CS);
// LCD5110 myGLCD(8,9,10,11,12);

LCD5110 myGLCD(8,4,5,6,7);

extern uint8_t SmallFont[];

void setup()
{
  myGLCD.InitLCD();
  myGLCD.setFont(SmallFont);
}

void loop()
{
  myGLCD.clrScr();
  myGLCD.print("Upper case:", LEFT, 0);
  myGLCD.print("ABCDEFGHIJKLM", CENTER, 16);
  myGLCD.print("NOPQRSTUVWXYZ", CENTER, 24);
  delay (5000);

  myGLCD.clrScr();
  myGLCD.print("Lower case:", LEFT, 0);
  myGLCD.print("abcdefghijklm", CENTER, 16);
  myGLCD.print("nopqrstuvwxyz", CENTER, 24);
  delay (5000);

  myGLCD.clrScr();
  myGLCD.print("Numbers:", LEFT, 0);
  myGLCD.print("0123456789", CENTER, 16);
  delay (5000);

  myGLCD.clrScr();
  myGLCD.print("Special:", LEFT, 0);
  myGLCD.print("!\"#$%&'()*+,-.", CENTER, 16);
  myGLCD.print("/:;<=>?@[\\]^_`", CENTER, 24);
  myGLCD.print("{|}~", CENTER, 32);
  delay (5000);
}
LCD5110_Bitmap
// LCD5110_Bitmap
// Copyright (C)2015 Rinky-Dink Electronics, Henning Karlsen. All right reserved
// web: http://www.RinkyDinkElectronics.com/
//
// This program is a demo of how to use bitmaps.
// You can also see how to use invert().
//
// This program requires a Nokia 5110 LCD module.
//
// It is assumed that the LCD module is connected to
// the following pins using a levelshifter to get the
// correct voltage to the module.
//      SCK  - Pin 8
//      MOSI - Pin 9
//      DC   - Pin 10
//      RST  - Pin 11
//      CS   - Pin 12
//
#include <LCD5110_Basic.h>

// #define RST 6
// #define CE 7
// #define DC 5
// #define DIN 4
// #define CLK 8
// LCD5110(int SCK, int MOSI, int DC, int RST, int CS);
// LCD5110 myGLCD(8,9,10,11,12);

LCD5110 myGLCD(8,4,5,6,7);

extern uint8_t arduino_logo[];
extern uint8_t oshw_logo[];

void setup()
{
  myGLCD.InitLCD();
}

void loop()
{
  myGLCD.drawBitmap(0, 0, arduino_logo, 84, 48);
  delay(4000);
  for (int i=0; i<2; i++)
  {
    myGLCD.invert(true);
    delay(500);
    myGLCD.invert(false);
    delay(500);
  }
  delay(4000);

  myGLCD.clrScr();
  myGLCD.drawBitmap(14, 0, oshw_logo, 56, 48);
  delay(4000);
  for (int i=0; i<2; i++)
  {
    myGLCD.invert(true);
    delay(500);
    myGLCD.invert(false);
    delay(500);
  }
  delay(4000);
}
LCD5110_Sleep_Mode
// LCD5110_Sleep_Mode
// Copyright (C)2015 Rinky-Dink Electronics, Henning Karlsen. All right reserved
// web: http://www.RinkyDinkElectronics.com/
//
// This program is a demo of sleep mode.
//
// This program requires a Nokia 5110 LCD module.
//
// It is assumed that the LCD module is connected to
// the following pins using a levelshifter to get the
// correct voltage to the module.
//      SCK  - Pin 8
//      MOSI - Pin 9
//      DC   - Pin 10
//      RST  - Pin 11
//      CS   - Pin 12
//
#include <LCD5110_Basic.h>

// #define RST 6
// #define CE 7
// #define DC 5
// #define DIN 4
// #define CLK 8
// LCD5110(int SCK, int MOSI, int DC, int RST, int CS);
// LCD5110 myGLCD(8,9,10,11,12);

LCD5110 myGLCD(8,4,5,6,7);

extern uint8_t SmallFont[];
extern uint8_t MediumNumbers[];

void setup()
{
  myGLCD.InitLCD();
}

void loop()
{
  myGLCD.setFont(SmallFont);
  myGLCD.clrScr();
  myGLCD.print("Entering", CENTER, 0);
  myGLCD.print("Sleep Mode", CENTER, 8);
  myGLCD.print("in", CENTER, 16);
  myGLCD.print("Seconds", CENTER, 40);

  myGLCD.setFont(MediumNumbers);
  for (int s=10; s>=0; s--)
  {
    myGLCD.printNumI(s, CENTER, 24, 2, '0');
    delay(1000);
  }

  myGLCD.enableSleep();

  delay(5000);
  myGLCD.disableSleep();
  myGLCD.setFont(SmallFont);
  myGLCD.print("Awake again!", CENTER, 0);
  myGLCD.print("The screen was", CENTER, 16);
  myGLCD.print("cleared while", CENTER, 24);
  myGLCD.print("in Sleep Mode.", CENTER, 32);
  delay(5000);
}
Library: LCD5110_Graph
LCD5110_Scrolling_Text
// LCD5110_Scrolling_Text
// Copyright (C)2015 Rinky-Dink Electronics, Henning Karlsen. All right reserved
// web: http://www.RinkyDinkElectronics.com/
//
// This program is a demo of how to use print().
//
// This program requires a Nokia 5110 LCD module.
//
// It is assumed that the LCD module is connected to
// the following pins using a levelshifter to get the
// correct voltage to the module.
//      SCK  - Pin 8
//      MOSI - Pin 9
//      DC   - Pin 10
//      RST  - Pin 11
//      CS   - Pin 12
//
#include <LCD5110_Graph.h>

// #define RST 6
// #define CE 7
// #define DC 5
// #define DIN 4
// #define CLK 8
// LCD5110(int SCK, int MOSI, int DC, int RST, int CS);
// LCD5110 myGLCD(8,9,10,11,12);

LCD5110 myGLCD(8,4,5,6,7);

extern uint8_t SmallFont[];

int y;

void setup()
{
  myGLCD.InitLCD();
  myGLCD.setFont(SmallFont);
  randomSeed(analogRead(0));
}

void loop()
{
  y = random(0, 40);
  for (int i=84; i>=-(34*6); i--)
  {
    myGLCD.print("LCD5110_Graph Scrolling Text Demo ", i, y);
    myGLCD.update();
    delay(60);
  }
}
LCD5110_Graph_Demo
// LCD5110_Graph_Demo
// Copyright (C)2015 Rinky-Dink Electronics, Henning Karlsen. All right reserved
// web: http://www.RinkyDinkElectronics.com/
//
// This program is a demo of most of the functions
// in the library.
//
// This program requires a Nokia 5110 LCD module.
//
// It is assumed that the LCD module is connected to
// the following pins using a levelshifter to get the
// correct voltage to the module.
//      SCK  - Pin 8
//      MOSI - Pin 9
//      DC   - Pin 10
//      RST  - Pin 11
//      CS   - Pin 12
//
#include <LCD5110_Graph.h>

// #define RST 6
// #define CE 7
// #define DC 5
// #define DIN 4
// #define CLK 8
// LCD5110(int SCK, int MOSI, int DC, int RST, int CS);
// LCD5110 myGLCD(8,9,10,11,12);

LCD5110 myGLCD(8,4,5,6,7);

extern uint8_t SmallFont[];
extern uint8_t arduino_logo[];
extern unsigned char TinyFont[];
extern uint8_t The_End[];
extern uint8_t pacman1[];
extern uint8_t pacman2[];
extern uint8_t pacman3[];
extern uint8_t pill[];

float y;
uint8_t* bm;
int pacy;

void setup()
{
  myGLCD.InitLCD();
  myGLCD.setFont(SmallFont);
  randomSeed(analogRead(7));
}

void loop()
{
  myGLCD.clrScr();
  myGLCD.drawBitmap(0, 0, arduino_logo, 84, 48);
  myGLCD.update();

  delay(2000);

  myGLCD.clrScr();
  myGLCD.print("LCD5110_Graph", CENTER, 0);
  myGLCD.print("DEMO", CENTER, 20);
  myGLCD.drawRect(28, 18, 56, 28);
  for (int i=0; i<6; i++)
  {
    myGLCD.drawLine(57, 18+(i*2), 83-(i*3), 18+(i*2));
    myGLCD.drawLine((i*3), 28-(i*2), 28, 28-(i*2));
  }
  myGLCD.setFont(TinyFont);
  myGLCD.print("(C)2015 by", CENTER, 36);
  myGLCD.print("Henning Karlsen", CENTER, 42);
  myGLCD.update();

  delay(5000);

  myGLCD.clrScr();
  for (int i=0; i<48; i+=2)
  {
    myGLCD.drawLine(0, i, 83, 47-i);
    myGLCD.update();
  }
  for (int i=83; i>=0; i-=2)
  {
    myGLCD.drawLine(i, 0, 83-i, 47);
    myGLCD.update();
  }

  delay(2000);

  myGLCD.clrScr();
  myGLCD.drawRect(0, 0, 83, 47);
  for (int i=0; i<48; i+=4)
  {
    myGLCD.drawLine(0, i, i*1.75, 47);
    myGLCD.update();
  }
  for (int i=0; i<48; i+=4)
  {
    myGLCD.drawLine(83, 47-i, 83-(i*1.75), 0);
    myGLCD.update();
  }

  delay(2000);

  myGLCD.clrScr();
  for (int i=0; i<8; i++)
  {
    myGLCD.drawRoundRect(i*3, i*3, 83-(i*3), 47-(i*3));
    myGLCD.update();
  }

  delay(2000);

  myGLCD.clrScr();
  for (int i=0; i<17; i++)
  {
    myGLCD.drawCircle(41, 23, i*3);
    myGLCD.update();
  }

  delay(2000);

  myGLCD.clrScr();
  myGLCD.drawRect(0, 0, 83, 47);
  myGLCD.drawLine(0, 23, 84, 23);
  myGLCD.drawLine(41, 0, 41, 47);
  for (int c=0; c<4; c++)
  {
    for (int i=0; i<84; i++)
    {
      y=i*0.017453292519943295769236907684886;
      myGLCD.invPixel(i, (sin(y*6)*20)+23);
      myGLCD.update();
      delay(10);
    }
  }

  delay(2000);

  for (int pc=0; pc<3; pc++)
  {
    pacy=random(0, 28);

    for (int i=-20; i<84; i++)
    {
      myGLCD.clrScr();
      for (int p=4; p>((i+20)/20); p--)
        myGLCD.drawBitmap(p*20-8, pacy+7, pill, 5, 5);
      switch(((i+20)/3) % 4)
      {
        case 0: bm=pacman1;
                break;
        case 1: bm=pacman2;
                break;
        case 2: bm=pacman3;
                break;
        case 3: bm=pacman2;
                break;
      }
      myGLCD.drawBitmap(i, pacy, bm, 20, 20);
      myGLCD.update();
      delay(25);
    }
  }

  for (int i=0; i<25; i++)
  {
    myGLCD.clrScr();
    myGLCD.drawBitmap(0, i-24, The_End, 84, 24);
    myGLCD.update();
    delay(100);
  }
  myGLCD.setFont(SmallFont);
  myGLCD.print("Runtime (ms):", CENTER, 32);
  myGLCD.printNumI(millis(), CENTER, 40);
  myGLCD.update();
  for (int i=0; i<5; i++)
  {
    myGLCD.invert(true);
    delay(1000);
    myGLCD.invert(false);
    delay(1000);
  }
}
LCD5110_TinyFont_View
// LCD5110_TinyFont_View
// Copyright (C)2015 Rinky-Dink Electronics, Henning Karlsen. All right reserved
// web: http://www.RinkyDinkElectronics.com/
//
// This program is a demo of the tiniest font.
//
// This program requires a Nokia 5110 LCD module.
//
// It is assumed that the LCD module is connected to
// the following pins using a levelshifter to get the
// correct voltage to the module.
//      SCK  - Pin 8
//      MOSI - Pin 9
//      DC   - Pin 10
//      RST  - Pin 11
//      CS   - Pin 12
//
#include <LCD5110_Graph.h>

// #define RST 6
// #define CE 7
// #define DC 5
// #define DIN 4
// #define CLK 8
// LCD5110(int SCK, int MOSI, int DC, int RST, int CS);
// LCD5110 myGLCD(8,9,10,11,12);

LCD5110 myGLCD(8,4,5,6,7);

extern uint8_t TinyFont[];

void setup()
{
  myGLCD.InitLCD();
  myGLCD.setFont(TinyFont);
}

void loop()
{
  myGLCD.print(" !\"#$%&'()*+,-./", CENTER, 0);
  myGLCD.print("0123456789:;<=>?", CENTER, 6);
  myGLCD.print("@ABCDEFGHIJKLMNO", CENTER, 12);
  myGLCD.print("PQRSTUVWXYZ[\\]^_", CENTER, 18);
  myGLCD.print("`abcdefghijklmno", CENTER, 24);
  myGLCD.print("pqrstuvwxyz{|}~ ", CENTER, 30);
  myGLCD.update();

  while (1);
}
LCD5110_Sleep_Mode
// LCD5110_Sleep_Mode
// Copyright (C)2015 Rinky-Dink Electronics, Henning Karlsen. All right reserved
// web: http://www.RinkyDinkElectronics.com/
//
// This program is a demo of sleep mode.
//
// This program requires a Nokia 5110 LCD module.
//
// It is assumed that the LCD module is connected to
// the following pins using a levelshifter to get the
// correct voltage to the module.
//      SCK  - Pin 8
//      MOSI - Pin 9
//      DC   - Pin 10
//      RST  - Pin 11
//      CS   - Pin 12
//
#include <LCD5110_Graph.h>

// #define RST 6
// #define CE 7
// #define DC 5
// #define DIN 4
// #define CLK 8
// LCD5110(int SCK, int MOSI, int DC, int RST, int CS);
// LCD5110 myGLCD(8,9,10,11,12);

LCD5110 myGLCD(8,4,5,6,7);

extern uint8_t SmallFont[];
extern uint8_t MediumNumbers[];

void setup()
{
  myGLCD.InitLCD();
}

void loop()
{
  myGLCD.setFont(SmallFont);
  myGLCD.clrScr();
  myGLCD.print("Entering", CENTER, 0);
  myGLCD.print("Sleep Mode", CENTER, 8);
  myGLCD.print("in", CENTER, 16);
  myGLCD.print("Seconds", CENTER, 40);
  myGLCD.update();

  myGLCD.setFont(MediumNumbers);
  for (int s=10; s>=0; s--)
  {
    myGLCD.printNumI(s, CENTER, 24, 2, '0');
    myGLCD.update();
    delay(1000);
  }

  myGLCD.enableSleep();
  myGLCD.clrScr();
  myGLCD.setFont(SmallFont);
  myGLCD.print("Awake again!", CENTER, 0);
  myGLCD.print("Text has been", CENTER, 16);
  myGLCD.print("changed while", CENTER, 24);
  myGLCD.print("in Sleep Mode.", CENTER, 32);
  delay(5000);
  myGLCD.disableSleep();
  delay(5000);
}
Save
Save
Save
Save
Save
Save
Save
Save
Save
Save
Save
Save
Save
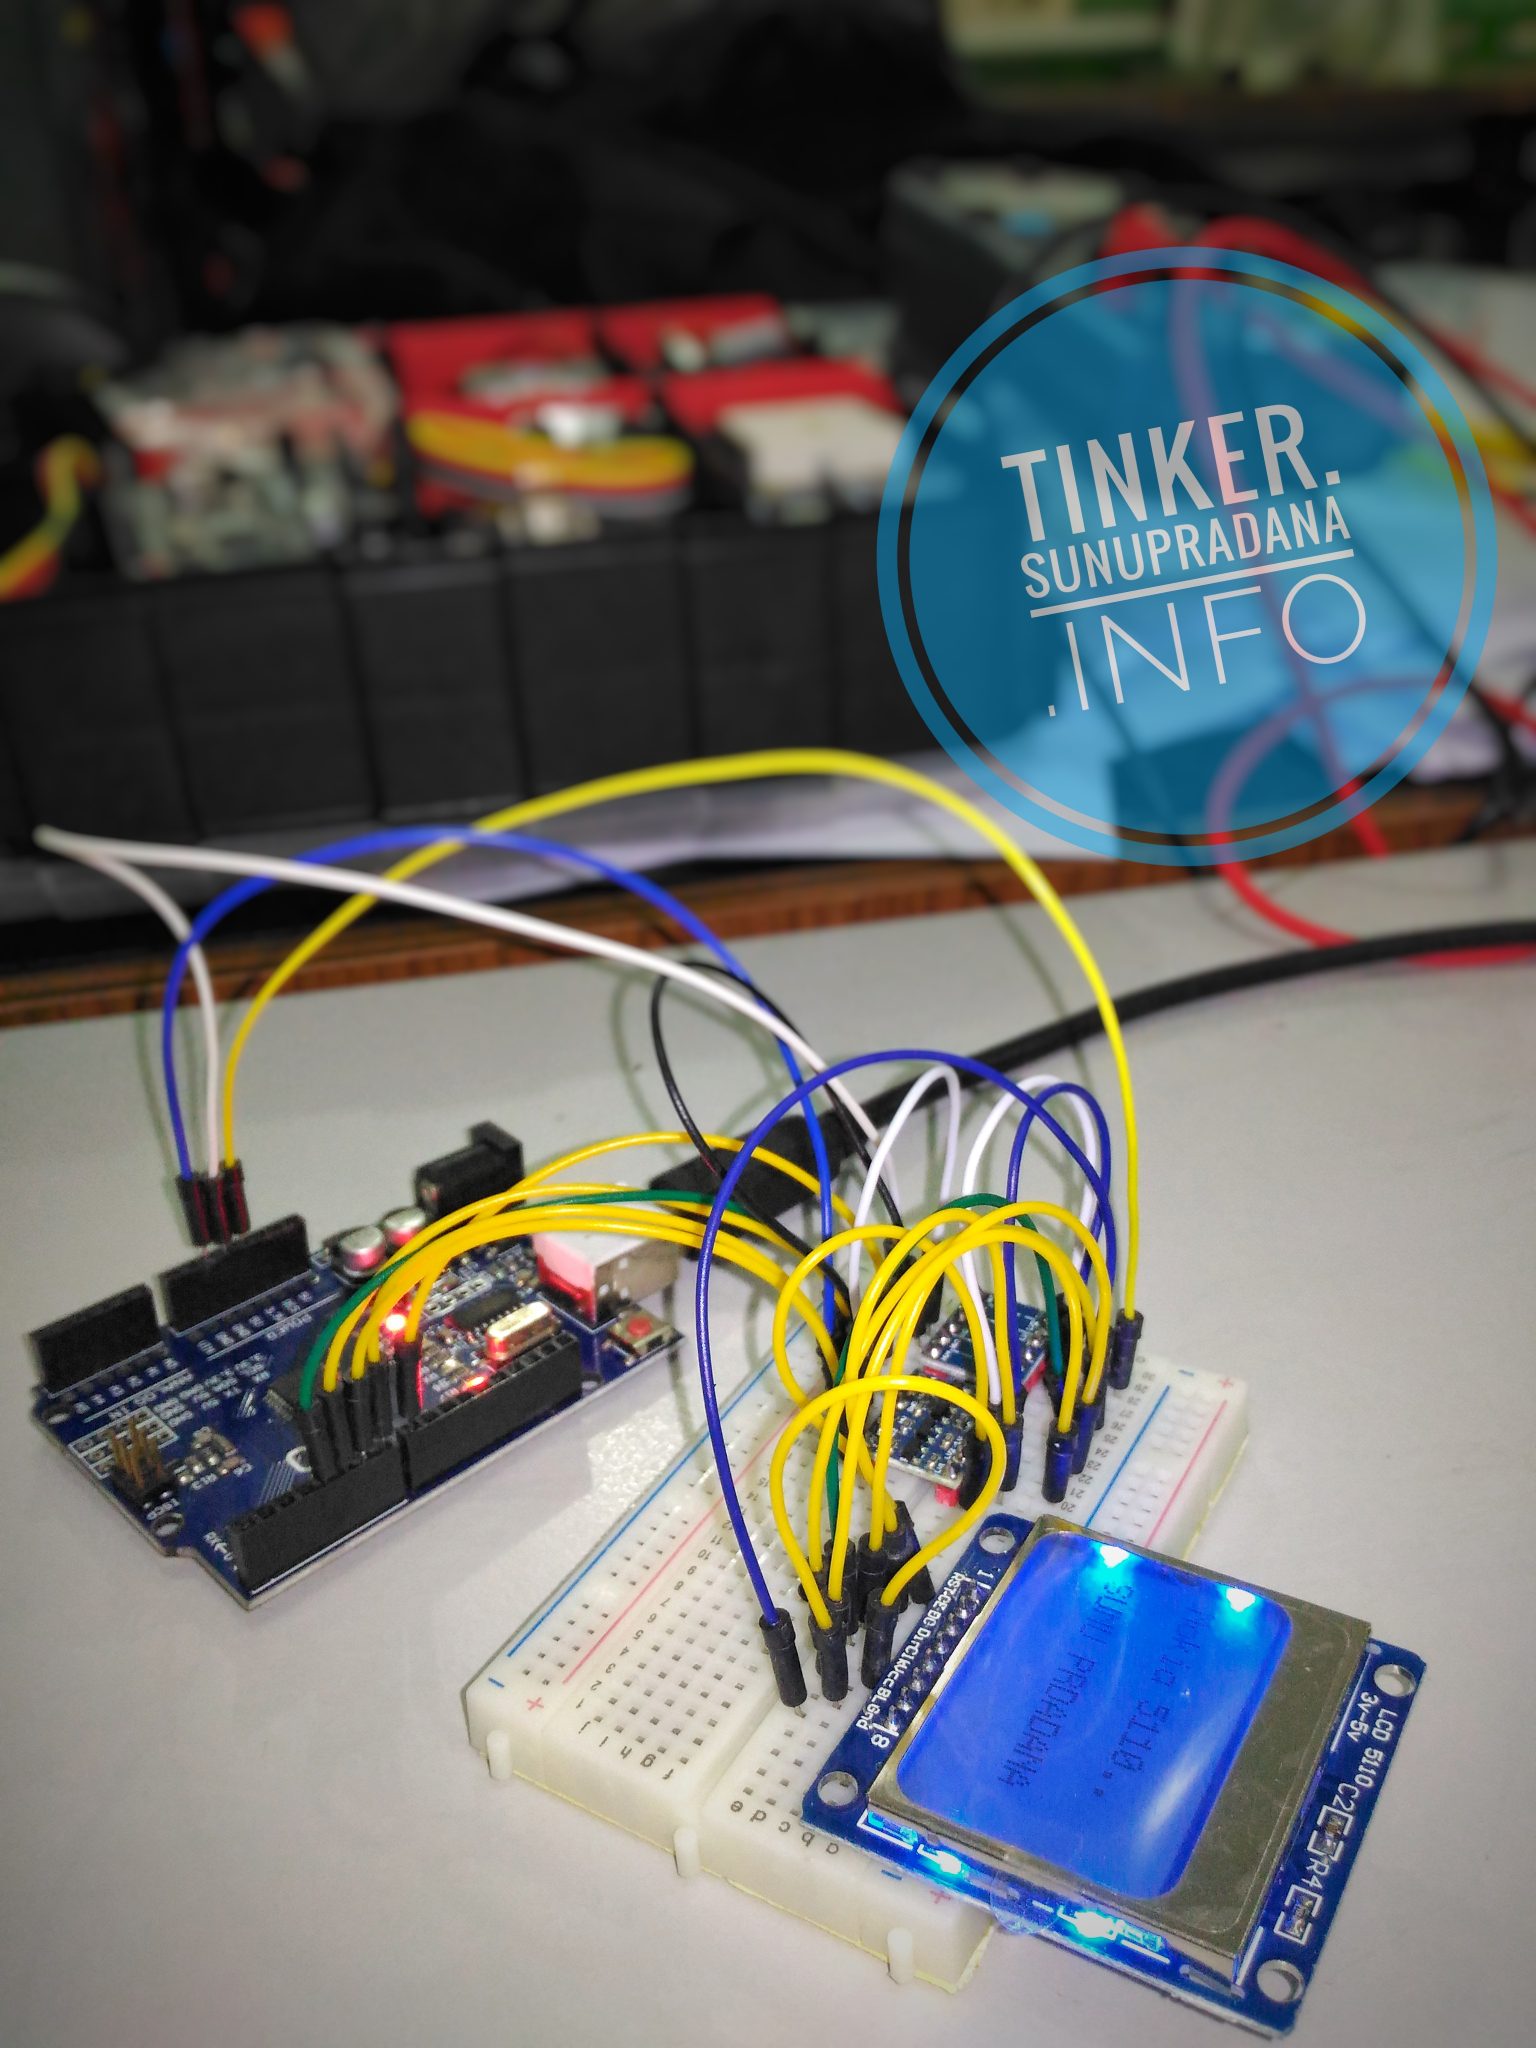
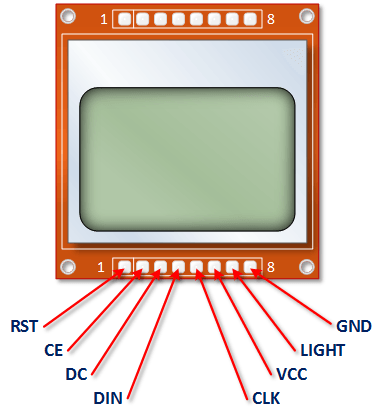
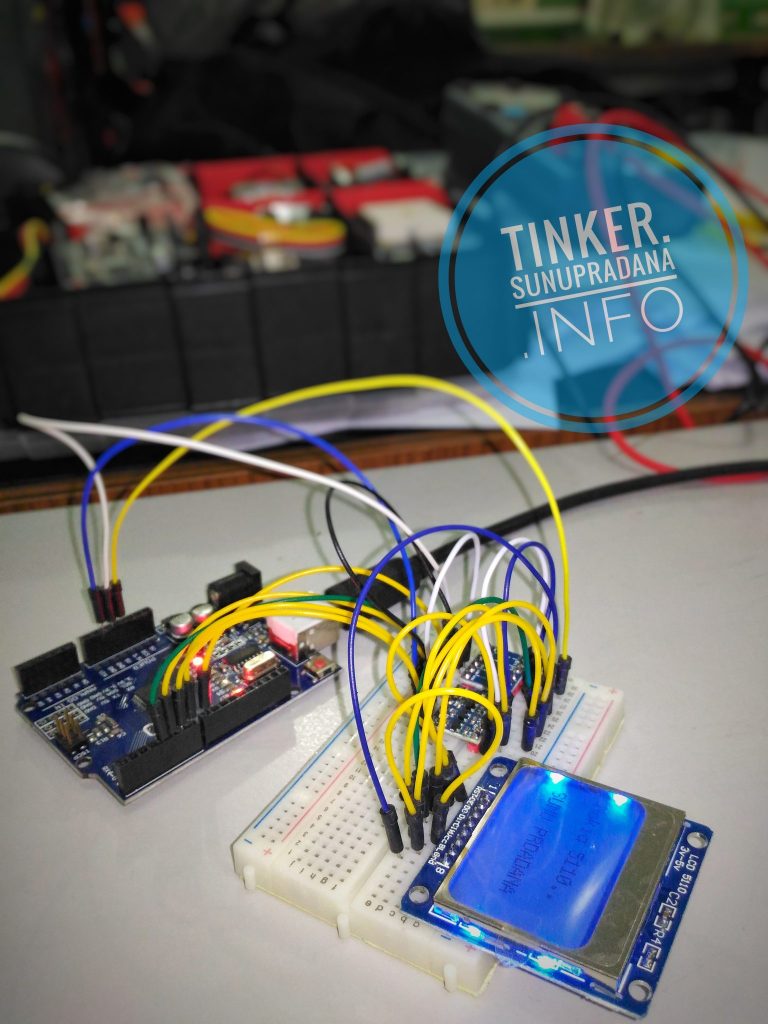
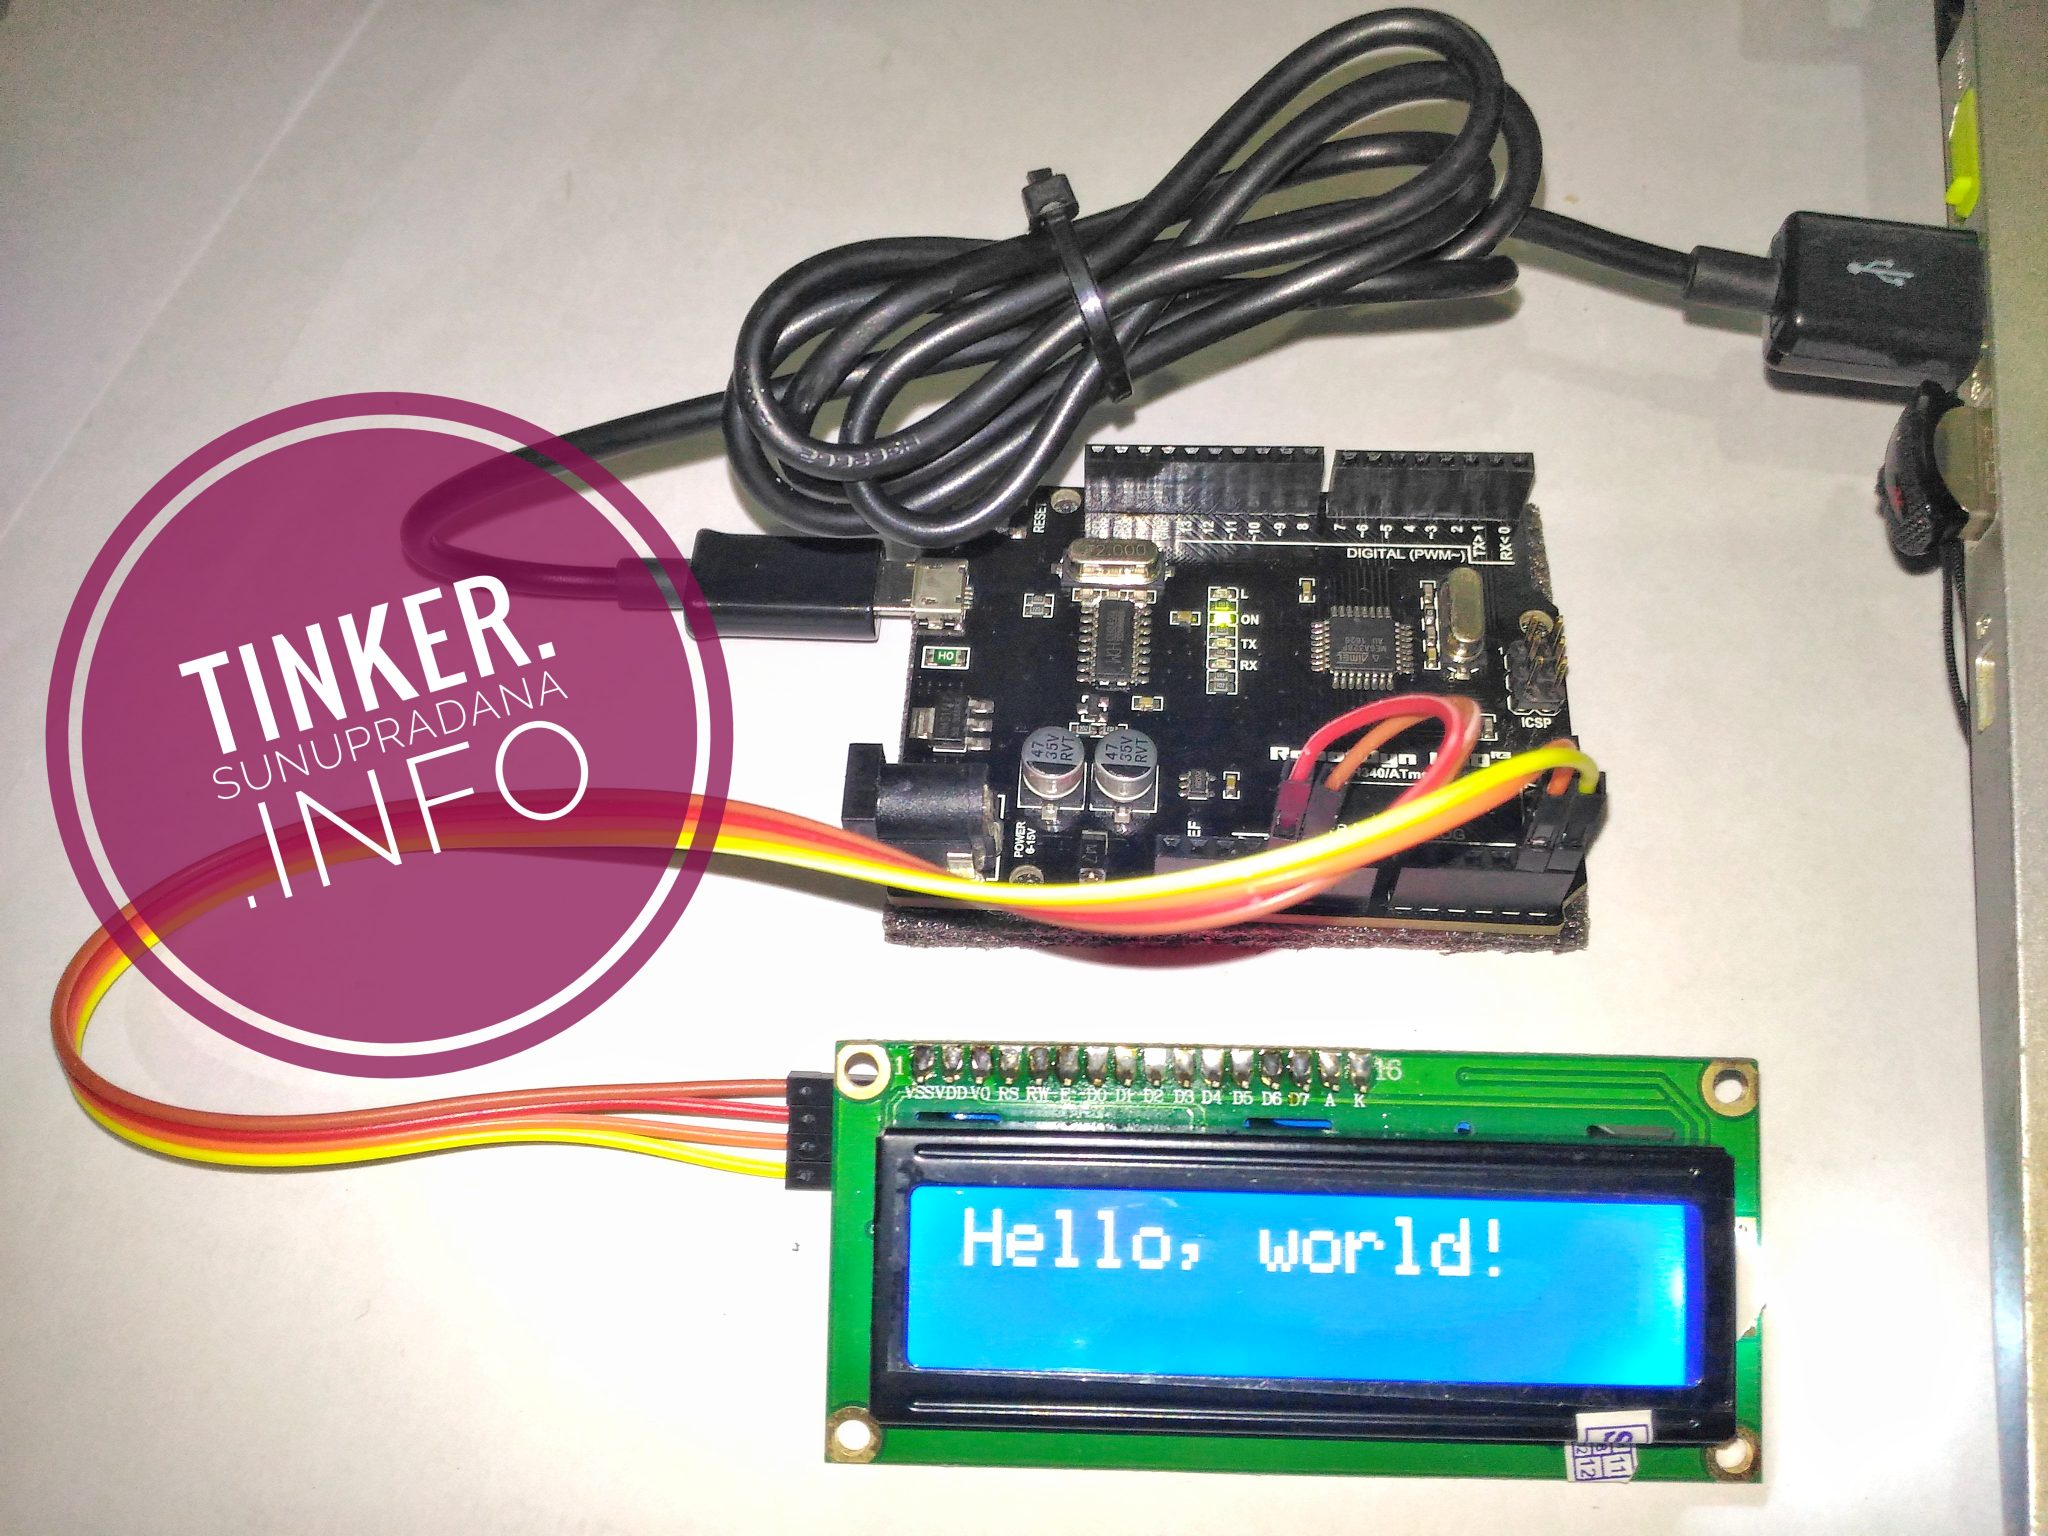
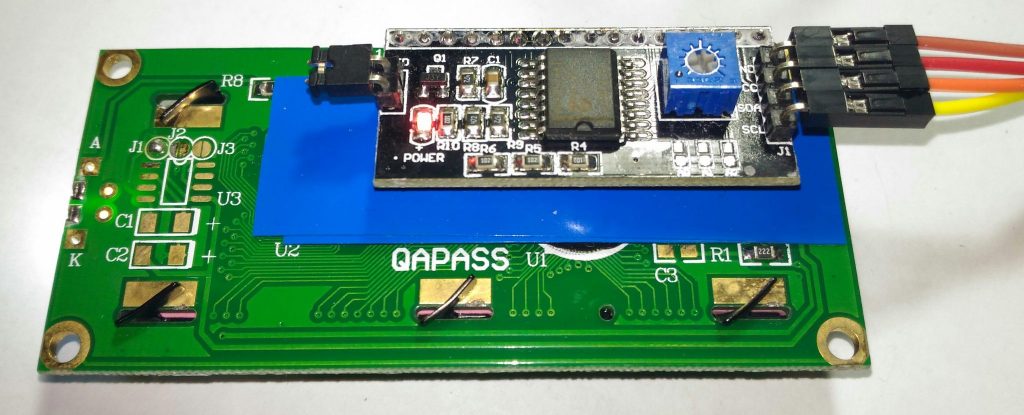
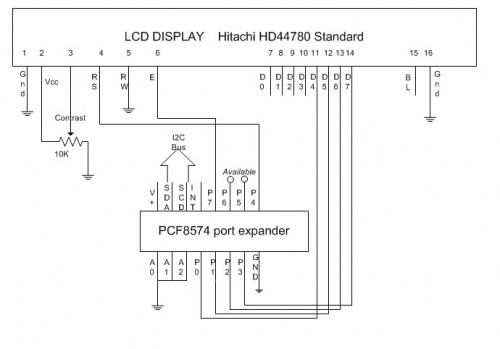 Gambar 3. [
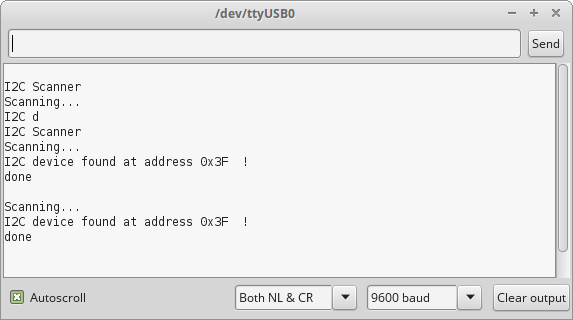 Gambar 4.
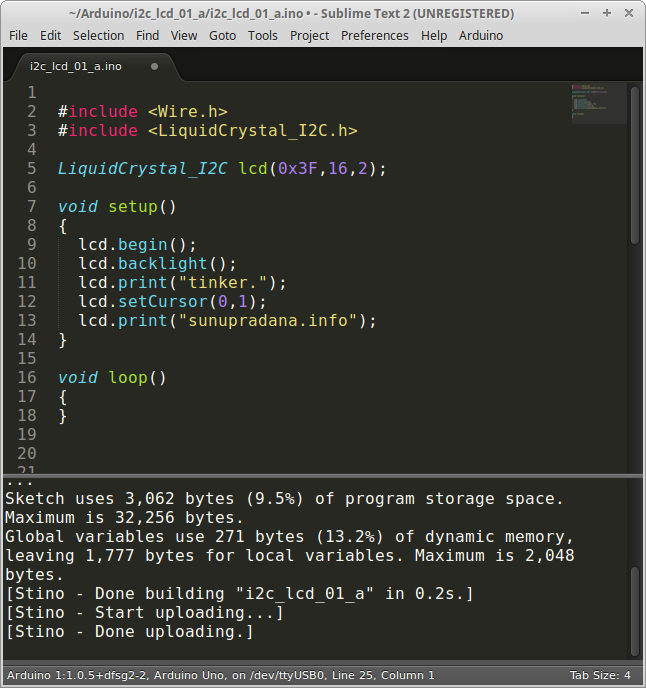 Gambar 5.
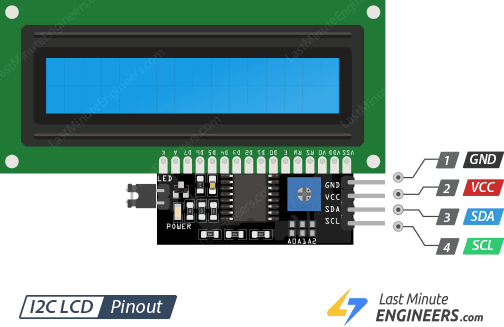
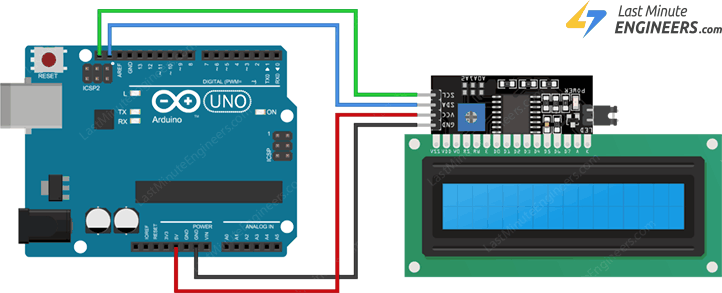
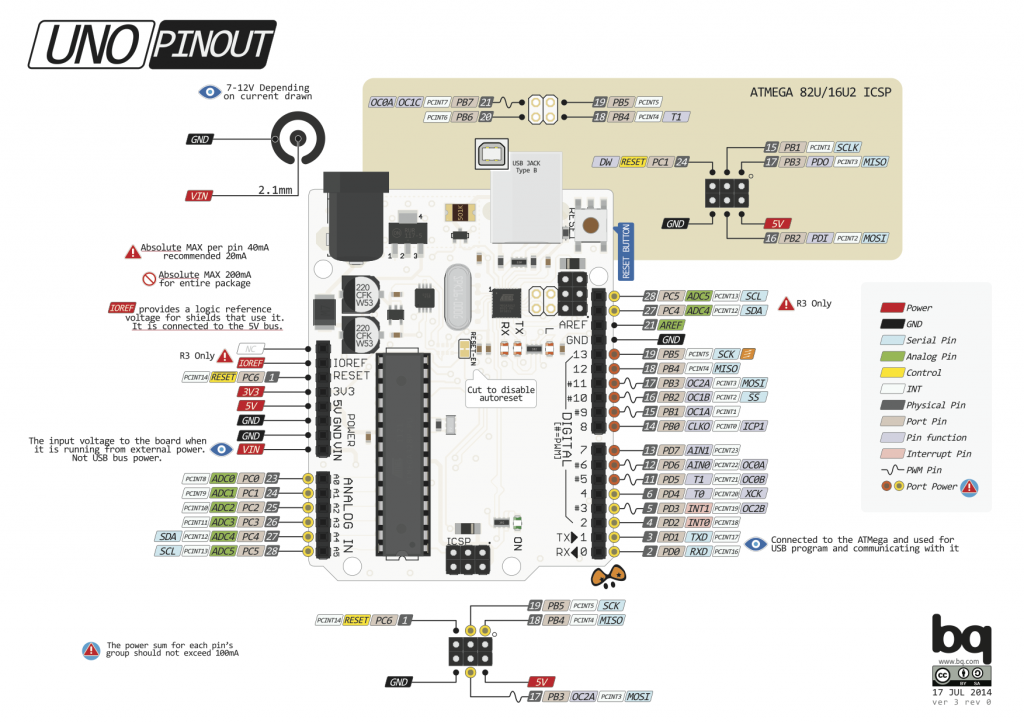
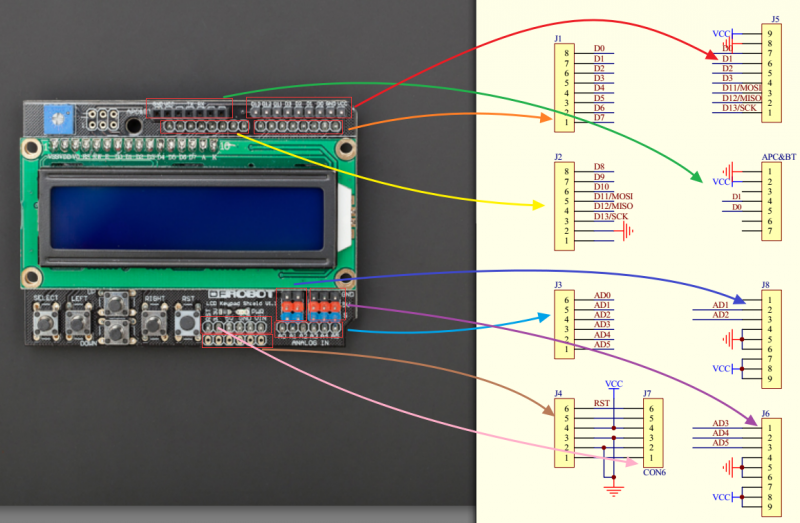 Gambar 2. [
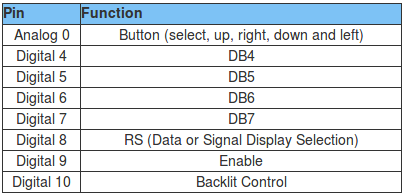
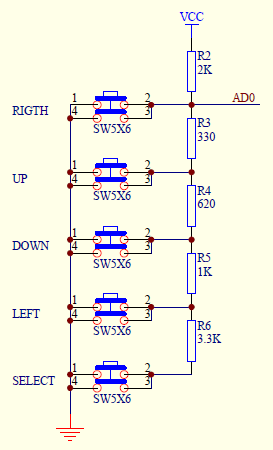 Gambar 3. [
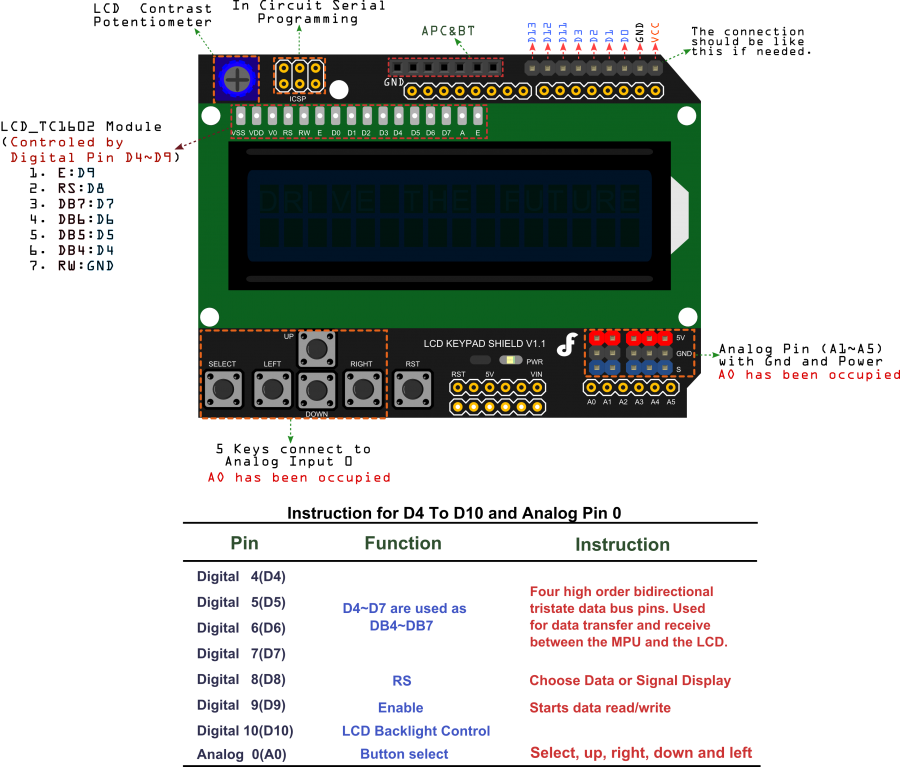 Gambar 4. [