Tujuh tahun lalu (2016) saya mencoba STM8 dan mendokumentasikannya di sini. Seiring waktu, teknologi yang dikembangkan secara sistematis untuk mempermudah pemrograman semakin matang. Saat ini STM8 sudah sedemikian mudah untuk diprogram dengan mempergunakan Arduino IDE dengan dialek bahasa turunan C dan C++.
Arduino IDE
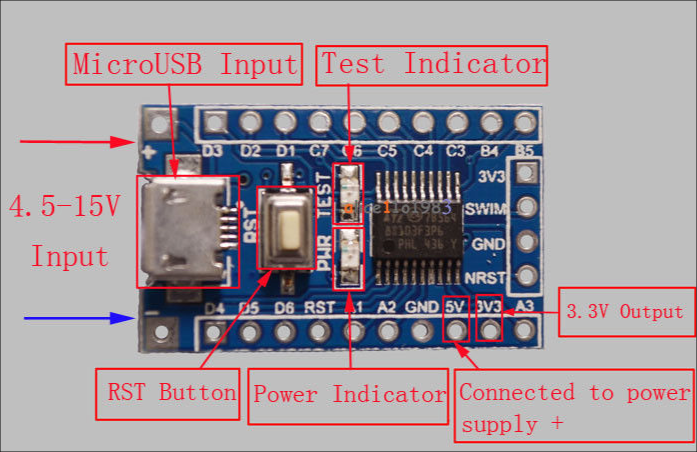
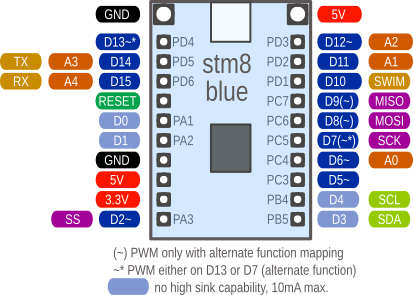
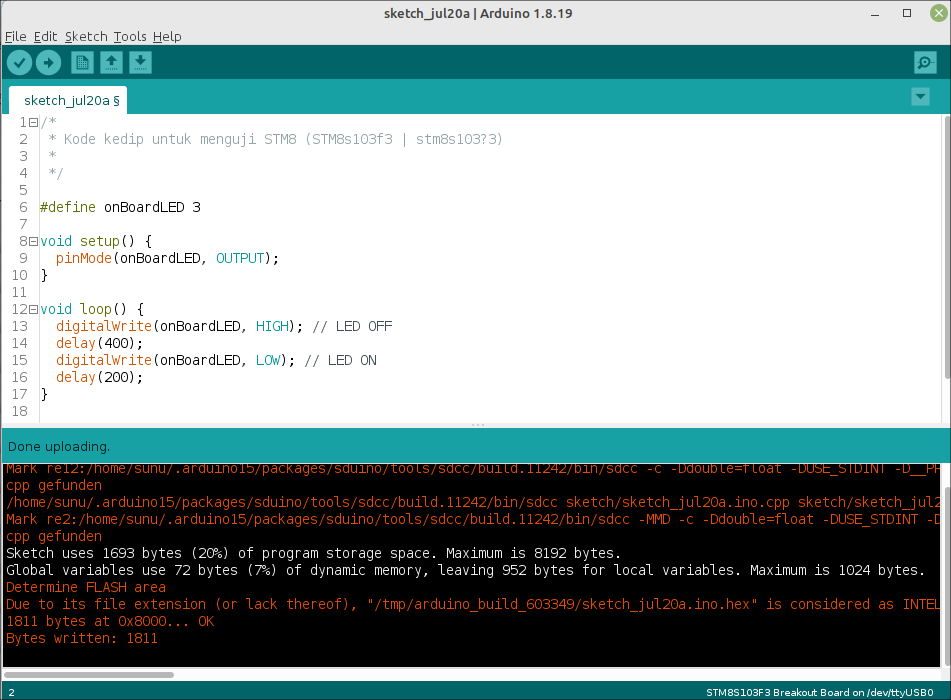
Cara pertama di artikel ini adalah dengan melakukan standar pengujian kode kedip (blink). LED di papan yang akan diatur terhubung dengan D3 (PB5).
* Kode kedip untuk menguji STM8 (STM8s103f3 | stm8s103?3)
*
*/
#define onBoardLED 3
void setup() {
pinMode(onBoardLED, OUTPUT);
}
void loop() {
digitalWrite(onBoardLED, HIGH); // LED OFF
delay(400);
digitalWrite(onBoardLED, LOW); // LED ON
delay(200);
}
[/sourcecode]
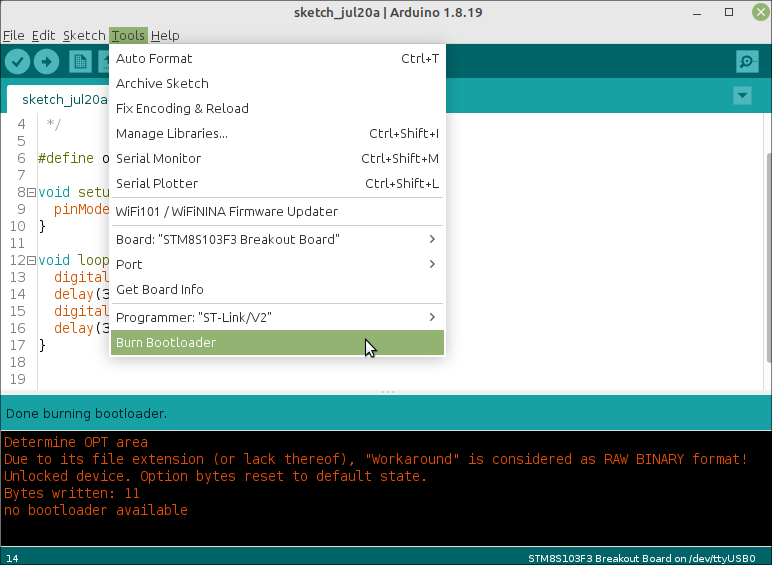
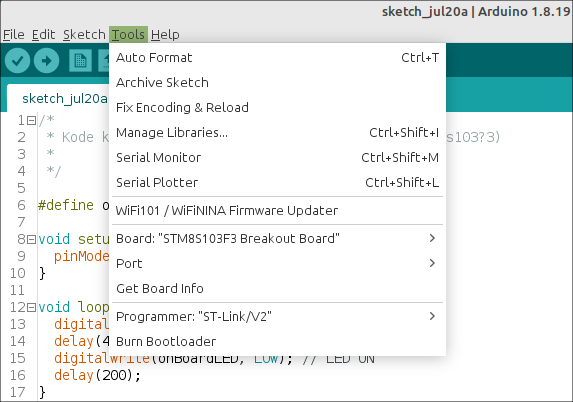
Eksekusi perintah “Burn Bootloader” seperti di Gambar 5 sebelum melakukan pemrograman sistem STM8 untuk pertama kali.
Berikutnya, dicoba pengaturan yang lebih kompleks, yaitu pemanfaatan fasilitas PWM.
[sourcecode] /*Dimodifikasi dari kode aslinya
Blink without Delay
created 2005
by David A. Mellis
modified 8 Feb 2010
by Paul Stoffregen
modified 11 Nov 2013
by Scott Fitzgerald
modified 9 Jan 2017
by Arturo Guadalupi
This example code is in the public domain.
https://www.arduino.cc/en/Tutorial/BuiltInExamples/BlinkWithoutDelay
*/
// constants won’t change. Used here to set a pin number:
const int ledPin = 3;// D3 (PB5 di papan STM8S103F3)
const int pwmTestA = 5;
const int pwmTestB = 13;
// Variables will change:
int pinState = LOW; // pinState used to set the LED
// Generally, you should use "unsigned long" for variables that hold time
// The value will quickly become too large for an int to store
unsigned long previousMillis = 0; // will store last time LED was updated
// constants won’t change:
const long interval = 10; // interval at which to blink (milliseconds)
void setup() {
// set the digital pin as output:
pinMode(ledPin, OUTPUT);
pinMode(pwmTestA, OUTPUT);
pinMode(pwmTestB, OUTPUT);
}
void loop() {
// here is where you’d put code that needs to be running all the time.
// check to see if it’s time to blink the LED; that is, if the difference
// between the current time and last time you blinked the LED is bigger than
// the interval at which you want to blink the LED.
unsigned long currentMillis = millis();
if (currentMillis - previousMillis >= interval) {
// save the last time you blinked the LED
previousMillis = currentMillis;
// if the LED is off turn it on and vice-versa:
if (pinState == LOW) {
pinState = HIGH; //LED OFF
} else {
pinState = LOW; //LED ON
}
// set the LED with the pinState of the variable:
digitalWrite(ledPin, pinState);
analogWrite(pwmTestA, 50);
analogWrite(pwmTestB, 50);
}
}
[/sourcecode]
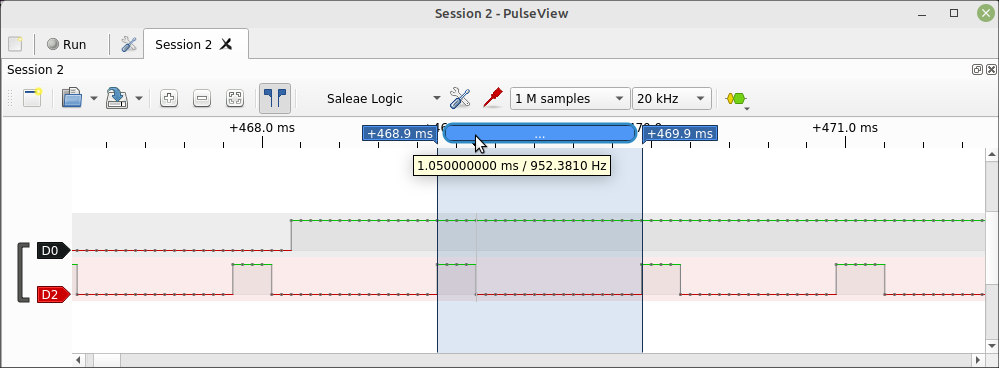
Cara pemrograman kode terakhir ini sama seperti sebelumnya. Dengan logic analyzer bisa dilihat lebar pulsa low kode kedip (Gambar 7) dan periode (frekuensi) PWM di D5 (PC3) di Gambar 8.
Berikutnya dengan bantuan oscilloscope ATTEN (f/w Siglent) bisa dilihat lebar pulsa high PWM di pin D13 (PD4).
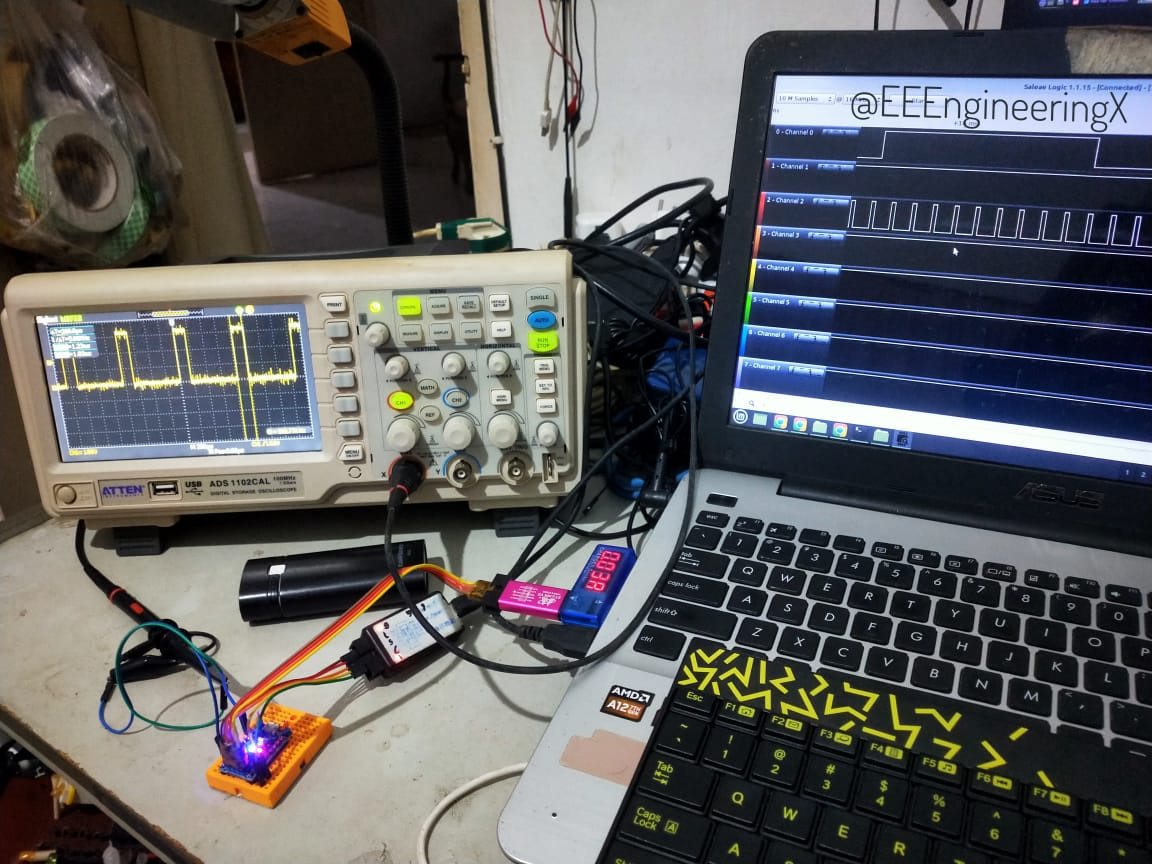
Juga dengan bantuan fasilitas di oscilloscope bisa dilihat dengan lebih baik profil rise time dari sinyal digital yang dibangkitkan oleh fasilitas PWM di STM8 (dengan pemrograman via Arduino).
SDCC STM8FLASH
Hampir sama dengan sebelumnya, berikut dicoba kembali kode program kedip dengan SDCC. Versi SDCC yang dipakai adalah 3.8.0 #10562 (Linux).
[sourcecode] #include "stm8l.h"int main() {
int d;
// Configure pins
PB_DDR = 0x20;
PB_CR1 = 0x20;
// Loop
do {
PB_ODR ^= 0x20;
for(d = 0; d < 29000; d++) { }
} while(1);
}
[/sourcecode]
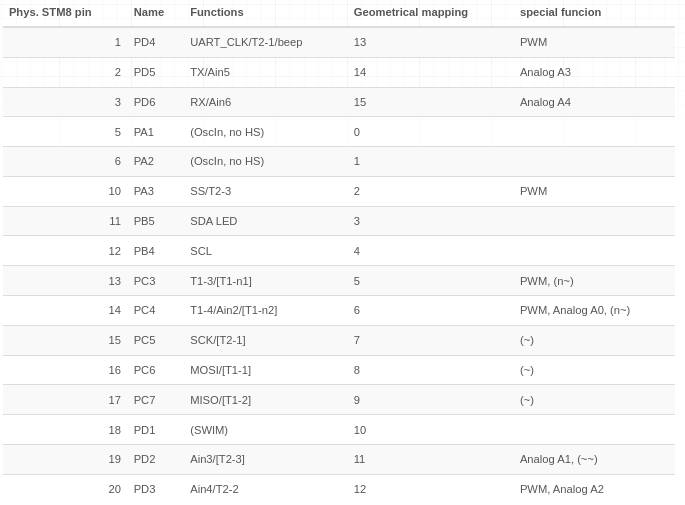
Penetapan nilai heksadesimal 0x20 (0b00100000) untuk PB_DDR (DDR5), PB_CR1 (C15), dan PB_ODR (ODR5) dapat dipelajari dari kutipan tabel berikut ini (sumber).
Jika papan stm8 baru pertama kali diprogram, beberapa perintah berikut ini perlu dijalankan untuk menghilangkan write protection (ROP /Read Out Protection ).
[intense_code type=”block”] echo “00” | xxd -r -p > ROP_CLEAR.binstm8flash -c stlinkv2 -p stm8s103?3 -s opt -w ROP_CLEAR.bin
[/intense_code]
Bisa juga mempergunakan versi berikut ini.
[intense_code type=”block”] echo “00 00 ff 00 ff 00 ff 00 ff 00 ff” | xxd -r -p > factory_defaults.binstm8flash -c stlinkv2 -p stm8s103?3 -s opt -w factory_defaults.bin
[/intense_code]
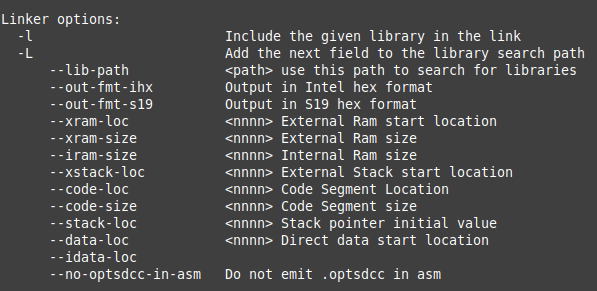
Berikutnya sebagai contoh program kedip disimpan di file yang diberi nama blinky.c. Untuk melakukan kompilasi, compiler sdcc yang dipergunakan. Sedangkan untuk memasukkan kode mesin hasil kompilasi, software stm8flash yang dipakai.
[intense_code type=”block”] sdcc -lstm8 -mstm8 -out-fmt-ihx blinky.cstm8flash -c stlinkv2 -p stm8s103?3 -w blinky.ihx
[/intense_code]

Rujukan:
- https://sunupradana.info/tkr/2016/08/16/uji-blinking-led-stm8-stm8s103f3p6/
- https://tenbaht.github.io/sduino/hardware/stm8blue/
- https://marcielbp.github.io/embedded-systems/stm8s-arduino/
- https://github.com/tenbaht/sduino/issues/85
- https://github.com/vdudouyt/stm8flash/issues/38
- https://community.st.com/s/question/0D53W00000S81OcSAJ/stm8s207rbt6-write-protected
- https://www.st.com/resource/en/programming_manual/pm0051-how-to-program-stm8s-and-stm8a-flash-program-memory-and-data-eeprom-stmicroelectronics.pdf
- https://lujji.github.io/blog/bare-metal-programming-stm8/
- https://w.electrodragon.com/w/STM8_SDCC
- https://www.codementor.io/@hbendali/getting-started-with-stm8-development-tools-on-gnu-linux-zu59yo35x
- http://sdcc.sourceforge.net/doc/sdccman.pdf