 Gambar 1. [sumber]
Sebelumnya, kutipan informasi dari dua RTC telah pernah diungkap di situs ini. Pertama DS1307, dan yang kedua adalah DS3231. Di halaman ini akan saya kutip keterangan mengenai RTC DS1302, yang bersama dua RTC terdahulu saya beli di situs online lokal.
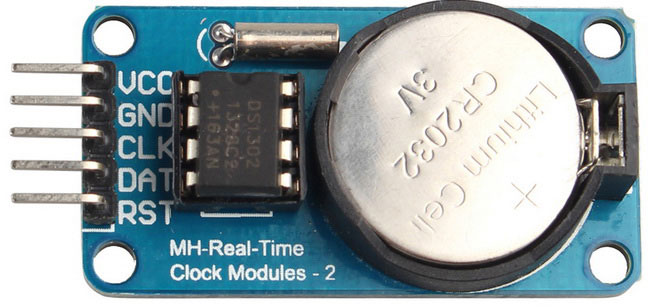
The DS1302 trickle-charge timekeeping chip contains a real-time clock/calendar and 31 bytes of static RAM. It communicates with a microprocessor via a simple serial interface. The real-time clock/calendar provides seconds, minutes, hours, day, date, month, and year information. The end of the month date is automatically adjusted for months with fewer than 31 days, including corrections for leap year. The clock operates in either the 24-hour or 12-hour format with an AM/PM indicator.
Interfacing the DS1302 with a microprocessor is simplified by using synchronous serial communication. Only three wires are required to communicate with the clock/RAM: CE, I/O (data line), and SCLK (serial clock). Data can be transferred to and from the clock/RAM 1 byte at a time or in a burst of up to 31 bytes. The DS1302 is designed to operate on very low power and retain data and clock information on less than 1µW.
The DS1302 is the successor to the DS1202. In addition to the basic timekeeping functions of the DS1202, the DS1302 has the additional features of dual power pins for primary and backup power supplies, programmable trickle charger for VCC1, and seven additional bytes of scratchpad memory.
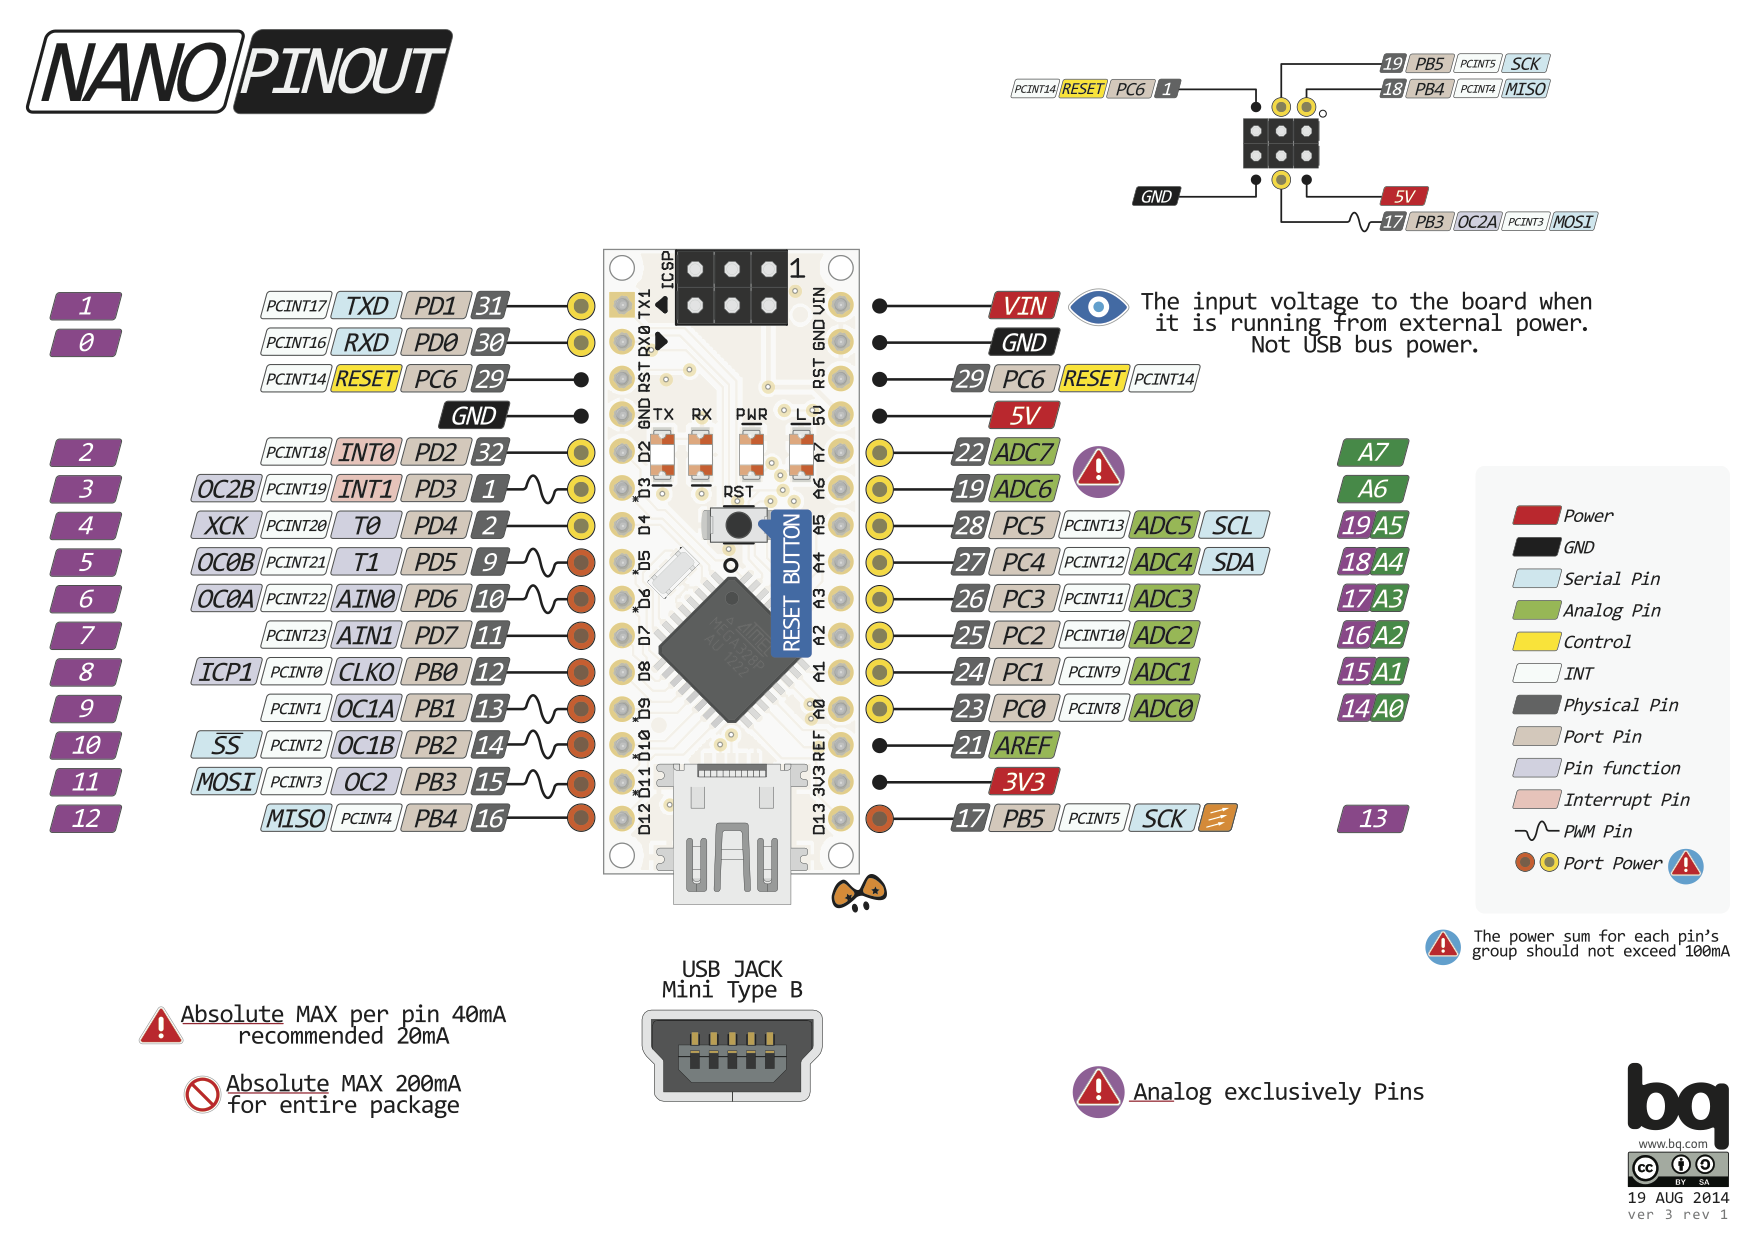
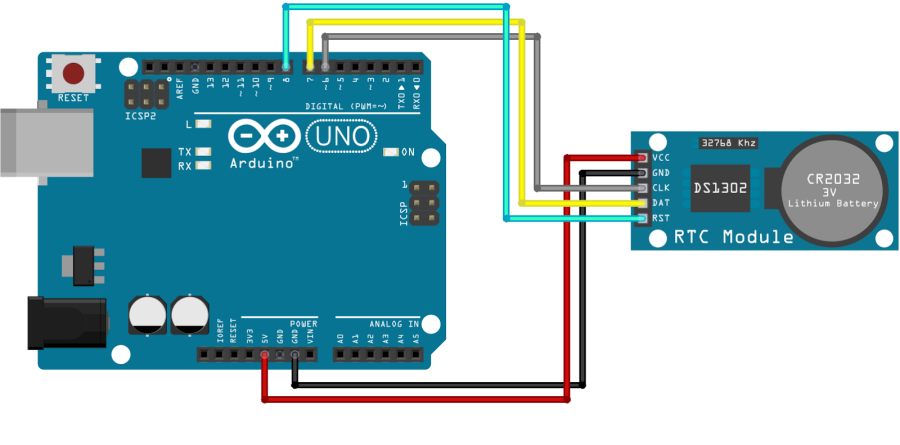 Gambar 2. domoticx.com/arduino-rtc-tijdklok-ds1302/
#include <DS1302.h>
// Init the DS1302
// DS1302 rtc([CE/RST], [I/O], [CLOCK]);
DS1302 rtc(8, 7, 6);
void setup() {
  // Set the clock to run-mode, and disable the write protection
  rtc.halt(false);
  rtc.writeProtect(false);
  // Setup Serial connection
  Serial.begin(9600);
  // The following lines can be commented out to use the values already stored in the DS1302
  rtc.setDOW(FRIDAY);        // Set Day-of-Week to FRIDAY
  rtc.setTime(12, 0, 0);     // Set the time to 12:00:00 (24hr format)
  rtc.setDate(6, 8, 2010);   // Set the date to August 6th, 2010
}
void loop() {
  // Send Day-of-Week
  Serial.print(rtc.getDOWStr());
  Serial.print(" ");
  // Send date
  Serial.print(rtc.getDateStr());
  Serial.print(" -- ");
  // Send time
  Serial.println(rtc.getTimeStr());
  // Wait one second before repeating :)
  delay (1000);
}
Pustaka yang diperlukan untuk mengeksekusi kode bisa diakses di link ini.
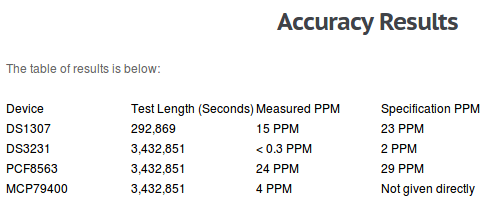
[/su_panel] [su_panel border=”3px solid #FF6666″ radius=”10″]Berdasarkan pengalaman saya menguji coba sistem ini dan pengalaman cukup banyak orang lain yang saya pantau di berbagai halaman di Internet, tampaknya sistem RTC DS1302 yang banyak beredar memiliki permasalahan dalam hal operasi. Banyak pengguna yang melaporkan kesalahan pembacaan jika mempergunakan IC ini. Ada beberapa kemungkinan, termasuk kemungkinan IC yang banyak diperjual-belikan yang memang memiliki grade yang lebih rendah.
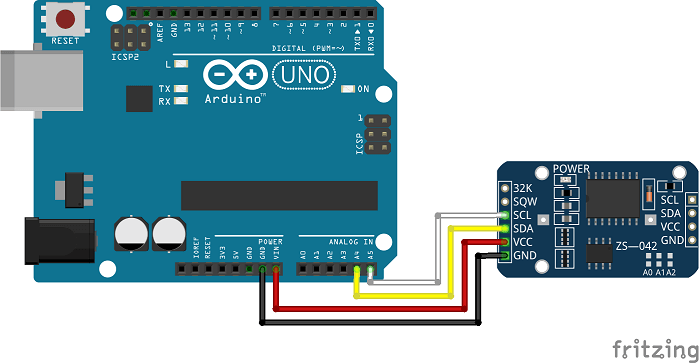
Secara praktis, sampai ditemukan solusi yang baik untuk IC ini (versi yang banyak dijual), akan lebih baik mempergunakan RTC DS1307 atau DS3231.
[/su_panel]
[su_panel border=”3px solid #990066″ radius=”10″]

 Gambar 2. [

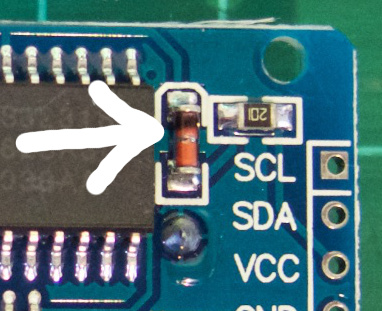 Gambar 3. [sumber: